Easy Easter Dirt Cake Recipe: A Fun No-Bake Dessert 🐰✨
Table of contents
1. Introduction
Spring is in the air, and what better way to celebrate Easter than with a playful and delicious dessert? The Easy Easter Dirt Cake is a no-bake treat that combines layers of crushed cookies resembling dirt, creamy chocolate pudding, and vibrant Easter candy toppings. This whimsical dessert captures the spirit of the season with its fun presentation and kid-friendly appeal.
What makes this dessert so special is its simplicity—no baking required—and its versatility. Whether you’re hosting an Easter brunch, family gathering, or themed party, this dirt cake is sure to be a hit. Its festive appearance and customizable toppings make it perfect for potlucks or holiday celebrations. Dive deeper into the origins of dirt cakes by visiting this link. For more springtime treats, explore our guide on spring-inspired recipes here.
2. What Is Easy Easter Dirt Cake?
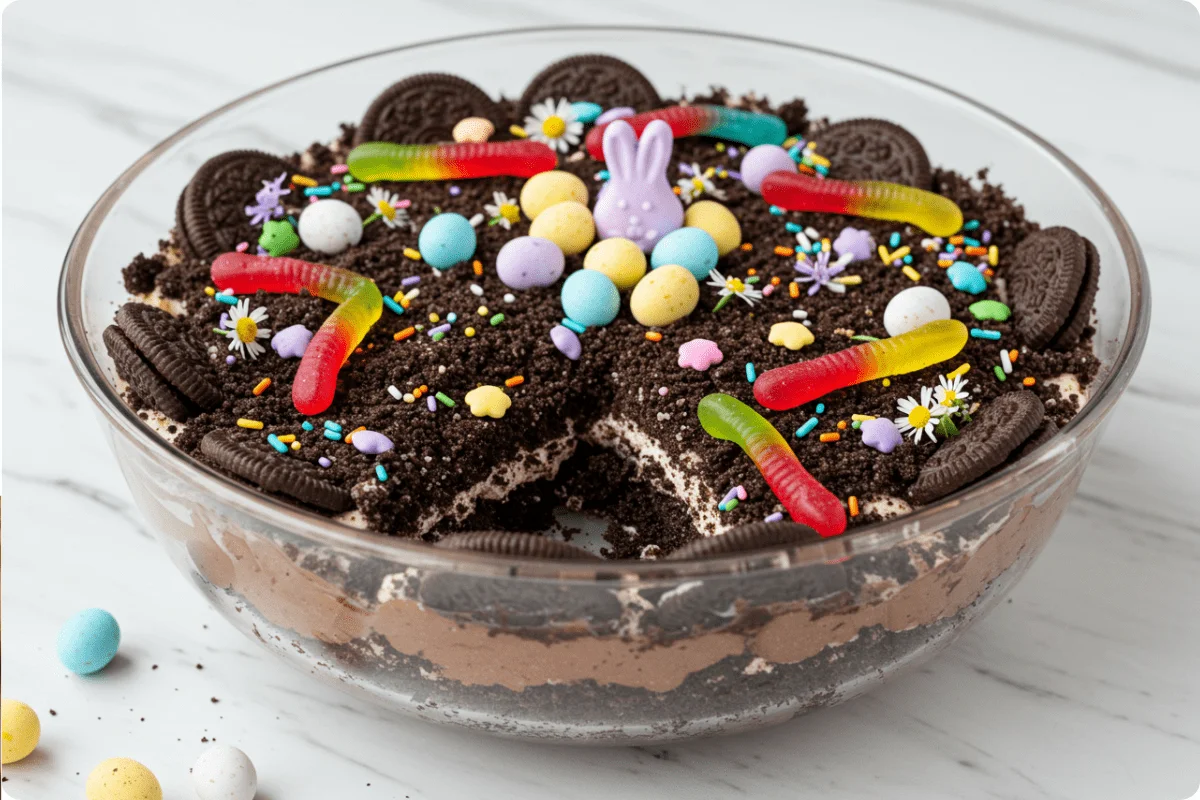
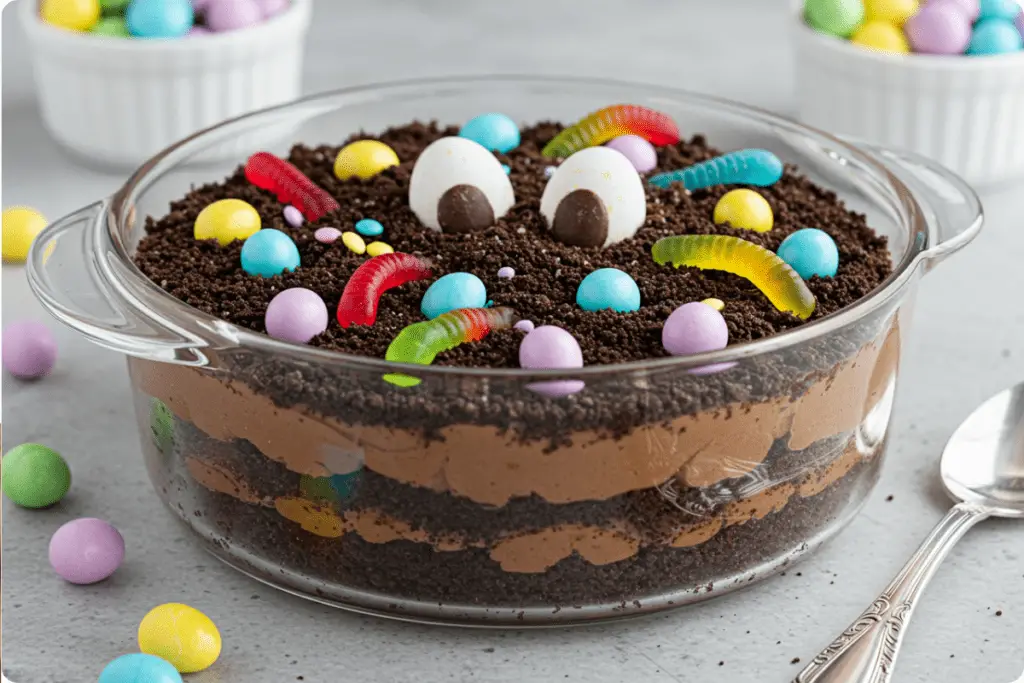
The Easy Easter Dirt Cake is a creative twist on the classic dirt cake dessert, designed to celebrate the magic of Easter festivities. This layered treat features crushed Oreo cookies as the “dirt,” a rich and creamy chocolate pudding mixture as the filling, and an array of colorful Easter-themed candies as the finishing touch. The result is a visually stunning dessert that’s as fun to look at as it is to eat!
This dessert has become a staple at Easter gatherings due to its playful presentation and ease of preparation. It’s a versatile centerpiece that fits seamlessly into themed parties, family events, or even casual get-togethers. Kids love helping assemble and decorate it, while adults appreciate how effortlessly it comes together. For tips on making homemade chocolate pudding, visit our guide on how to master chocolate pudding here.
3. Ingredients List (Exact Measurements)
To create this festive Easy Easter Dirt Cake, gather the following ingredients:
For the Dirt Cake Layers:
- 1 (14 oz) package Oreo cookies (crushed)
- 2 (3.9 oz) packages instant chocolate pudding mix
- 3 cups cold milk
- 8 oz whipped topping (Cool Whip), thawed
- 1 teaspoon vanilla extract
For the Toppings:
- Easter-themed candies (e.g., pastel M&Ms, Cadbury mini eggs, jelly beans)
- Optional: Gummy worms or bunnies for added fun
These simple ingredients come together to create a dessert that’s as delightful as it is festive. For more Easter candy ideas, browse our collection of holiday desserts here.
4. Step-by-Step Instructions
Preparing the Cookie Crust

Begin by crushing the entire package of Oreo cookies in a food processor or by placing them in a resealable plastic bag and crushing them with a rolling pin. You should have fine crumbs that resemble dirt. Reserve about 1 cup of the crushed cookies for later use. Spread the remaining crumbs evenly across the bottom of a 9×13-inch dish to form the base layer. Press down gently to compact the crumbs slightly. This forms the foundation of your dirt cake, giving it that authentic “dirt” texture. For more cookie-crushing techniques, check out our cupcake recipes here.
Making the Pudding Mixture
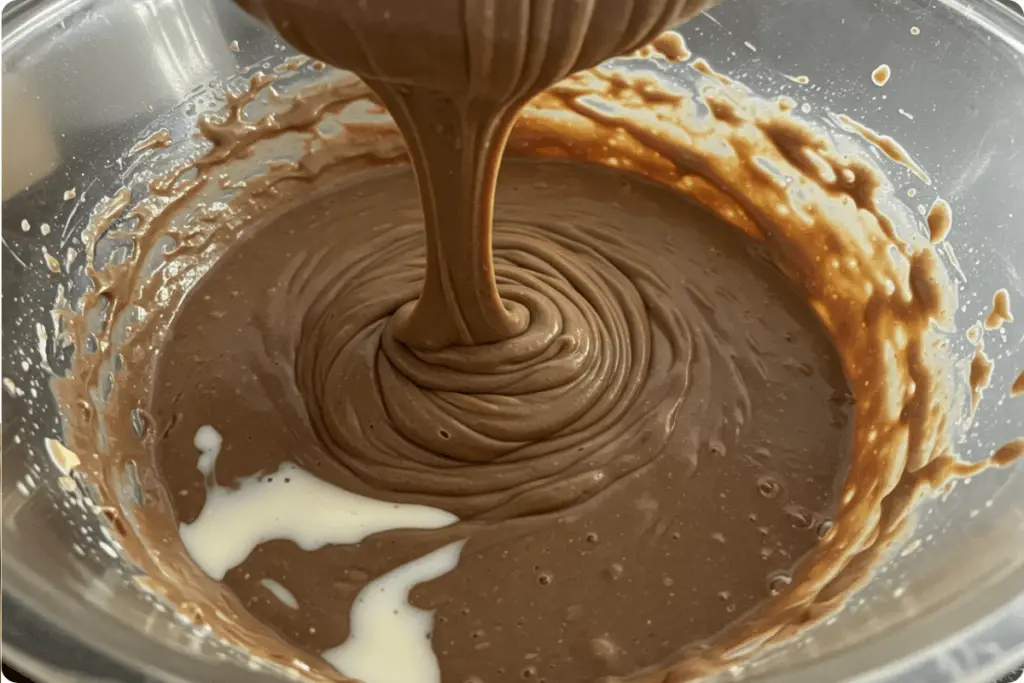
In a large mixing bowl, whisk together the two packages of instant chocolate pudding mix and 3 cups of cold milk until smooth and thickened. This should take about 2–3 minutes. Once the pudding begins to set, fold in the thawed whipped topping and 1 teaspoon of vanilla extract. Mix gently until fully combined, ensuring the mixture remains light and airy. The whipped topping adds a fluffy texture that complements the rich chocolate flavor perfectly. If you’d like to enhance the pudding further, consider adding a splash of coffee extract for depth. For more pudding-making tips, explore our guide on mastering chocolate pudding here.
Assembling the Layers
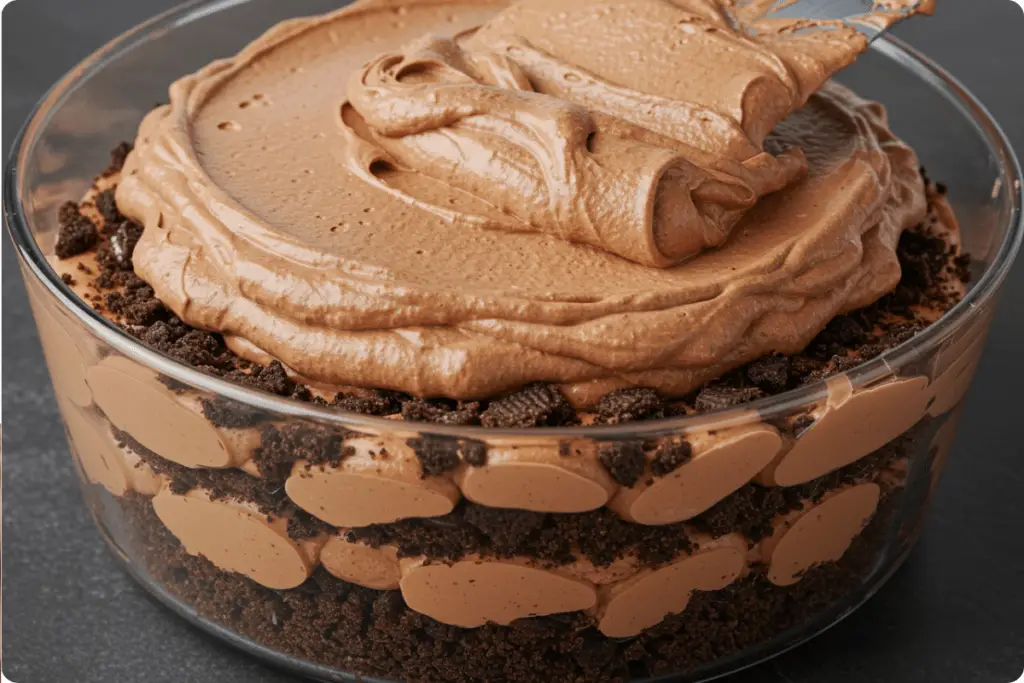
Once the pudding mixture is ready, spoon half of it over the crushed Oreo layer in the dish, spreading it evenly with a spatula. Sprinkle a generous layer of reserved crushed Oreos on top of the pudding. Repeat the process by adding the remaining pudding mixture and another layer of cookie crumbs. These alternating layers mimic the earthy texture of dirt while creating a beautiful visual effect when served. Chill the assembled cake in the refrigerator for at least 1 hour to allow the layers to firm up slightly before decorating.
Adding Easter Touches
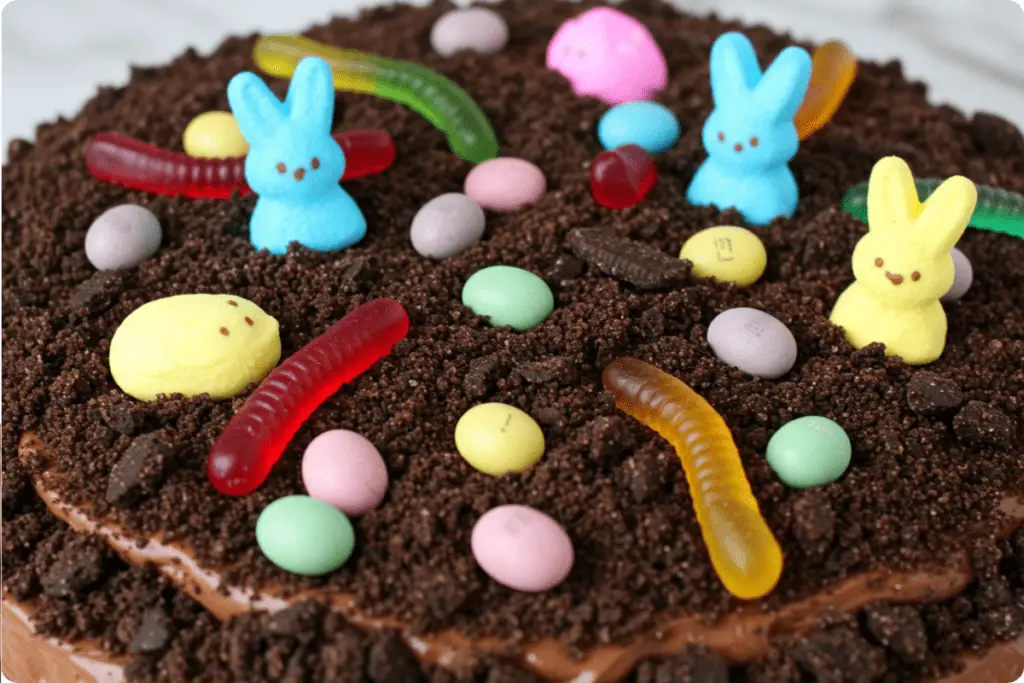
When the cake is chilled and set, it’s time to add the finishing touches. Decorate the top generously with Easter-themed candies such as pastel M&Ms, Cadbury mini eggs, and jelly beans. Arrange them creatively to resemble a garden or scatter them randomly for a playful look. For extra flair, tuck in gummy worms or bunnies around the edges. These small details elevate the dessert’s festive appeal and tie it perfectly into the Easter theme. Serve and enjoy the delight on everyone’s faces!
5. Decorating the Dessert
Transform your Easy Easter Dirt Cake into a work of art with creative decorations that capture the magic of spring. Arrange Easter candies in fun patterns like flowers, eggs, or bunny shapes to mimic a whimsical garden scene. Use pastel-colored candies such as M&Ms, Cadbury mini eggs, and jelly beans to enhance the springtime theme. For an extra touch, scatter gummy worms or bunnies across the top for added charm.
To make your dessert Instagram-worthy, focus on vibrant colors and thoughtful arrangements. Consider creating a border of candy around the edges or clustering similar colors together for a cohesive look. A light dusting of edible glitter or sprinkles can add sparkle and elevate the presentation even further. Remember, the key is to have fun and let your creativity shine through! For more inspiration on festive desserts, check out our guide on easy party desserts here.
6. Serving Suggestions
This Easy Easter Dirt Cake pairs beautifully with other holiday favorites like carrot cake, hot cross buns, or a refreshing sago summer drink. It’s perfect for serving at Easter brunches, family gatherings, or kids’ parties, where its playful appearance is sure to be a hit. To store leftovers, cover the dish tightly with plastic wrap and refrigerate for up to 3 days. This dessert can also be made ahead of time—prepare it up to 2 days in advance and keep it chilled until ready to serve. For more springtime treat ideas, explore our collection of holiday recipes here.
7. Variations and Substitutions
This recipe is versatile and adaptable to suit various dietary needs:
- Gluten-Free Option: Substitute regular Oreos with gluten-free chocolate sandwich cookies or crushed gluten-free graham crackers.
- Vegan Alternative: Use dairy-free pudding mix and whipped topping, along with vegan-friendly cookies, to create a plant-based version of this dessert.
- Different Flavor Profile: Swap Oreos with chocolate wafer cookies or golden sandwich cookies for a unique twist while maintaining the “dirt” effect.
These variations ensure everyone can enjoy this festive treat. For more creative dessert ideas, browse our dessert recipes here.
8. Nutritional Information
Each serving of Easy Easter Dirt Cake contains approximately 250 calories. Here’s the macronutrient breakdown per serving:
- Carbohydrates: 35g
- Fats: 12g
- Proteins: 3g
Please note that these values may vary slightly based on substitutions or portion sizes. Enjoy responsibly!
9. FAQs Section
Here are answers to some common questions about this recipe:
Q: Can I make this dessert ahead of time?
Absolutely! This dessert can be made up to 2 days in advance and stored in the refrigerator. Just add the toppings before serving to keep them fresh.
Q: Can I use homemade pudding instead of instant?
Yes! Homemade pudding works perfectly as long as it’s thick enough to hold its shape. Chill it before assembling the layers.
Q: What can I use instead of Oreos?
Chocolate wafer cookies, graham crackers, or any crunchy cookie will work well as a substitute for Oreos.
Q: How do I prevent the layers from getting soggy?
Chill the dessert immediately after assembling to help the layers firm up and maintain their texture.
10. Conclusion
Creating this Easy Easter Dirt Cake is a fun and festive way to celebrate the joy of spring and the magic of Easter. With its playful “dirt” theme, creamy layers, and colorful candy toppings, it’s a dessert that delights both kids and adults alike. Whether you’re hosting a holiday gathering, treating your family, or simply indulging in some seasonal baking, this no-bake treat is sure to bring smiles all around.
We’d love to see your creations! Share your photos on social media using the hashtag #EasterDirtCakeMagic and tag us for a chance to be featured. Have feedback or questions? Leave a comment below—we’re here to help! For more holiday dessert inspiration, explore our collection of seasonal recipes here. Happy baking!
Print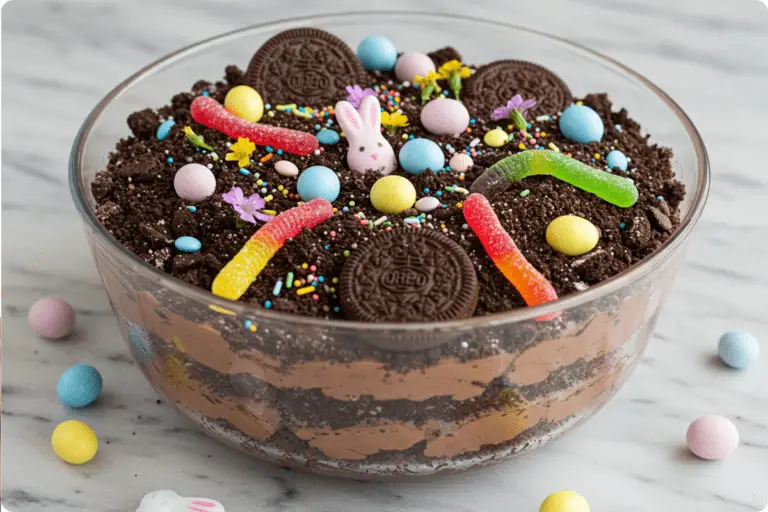
Easy Easter Dirt Cake
Celebrate Easter with this easy and fun dirt cake recipe! Layered with creamy chocolate pudding, crushed Oreos, and festive Easter candies, this no-bake dessert is perfect for spring celebrations. Whether you’re hosting a kids’ party or a family gathering, it’s a treat that’s sure to delight everyone. 🍫🥕
- Total Time: 15 minutes
- Yield: 12 servings 1x
Ingredients
For the Dirt Cake Layers:
- 1 (14 oz) package Oreo cookies (crushed)
- 2 (3.9 oz) packages instant chocolate pudding mix
- 3 cups cold milk
- 8 oz whipped topping (Cool Whip), thawed
- 1 tsp vanilla extract
For the Toppings:
- Easter-themed candies (e.g., pastel M&Ms, Cadbury mini eggs, jelly beans)
- Optional: gummy worms or bunnies for added fun
Instructions
1. Preparing the Cookie Crust
- In a food processor or plastic bag, crush the Oreo cookies until they resemble fine crumbs.
- Reserve about 1 cup of the crumbs for topping.
- Spread the remaining crushed cookies evenly in the bottom of a large 9×13-inch dish to create the “dirt” base.
2. Making the Pudding Mixture
- In a large bowl, whisk together the instant pudding mix and cold milk.
- Let it sit for about 5 minutes to thicken.
- Gently fold in the thawed whipped topping and vanilla extract until smooth and creamy.
- Adjust the pudding mixture’s consistency if needed by adding a little more milk.
3. Assembling the Layers
- Layer half of the pudding mixture over the crushed cookie base in the dish.
- Add another layer of crushed Oreos over the pudding, then repeat with the remaining pudding mixture.
- Finish by topping with the reserved crushed cookies.
4. Adding Easter Touches
- Decorate the top with colorful Easter candies such as pastel M&Ms, mini Cadbury eggs, or jelly beans.
- For extra fun, add gummy worms or bunnies on top to create a whimsical, garden-like effect.
Notes
- Make-Ahead Tip: The dessert can be made up to 2 days in advance. Simply cover and refrigerate until ready to serve.
- Storage: Keep refrigerated and serve within 3-4 days for the best freshness.
- Custom Toppings: Try adding sprinkles, marshmallow chicks, or even a few small chocolate eggs for variation.
- Prep Time: 15 minutes
- Category: Dessert
- Method: No-Bake
- Cuisine: American, Easter-themed
- Diet: Vegetarian