
Easter Trifle Dessert Recipe: Layers of Springtime Delight 🌸🎂
Table of contents
1. Introduction
Trifles are a timeless dessert that never fails to impress with their vibrant layers and delightful flavors. This Easter Trifle Dessert takes the classic trifle concept to new heights, combining soft cake, creamy layers, fresh fruits, and festive decorations into a show-stopping centerpiece perfect for spring celebrations. With its pastel hues and refreshing taste, this dessert captures the essence of Easter in every bite.
What makes this trifle truly special is its simplicity—no baking required if you use store-bought cake—and its versatility. Whether you’re hosting an Easter brunch, family dinner, or kids’ party, this trifle is sure to be a hit. Its colorful presentation and customizable elements make it ideal for themed gatherings or potlucks. For more inspiration on holiday desserts, explore our collection of festive dessert ideas here.
2. What Is an Easter Trifle Dessert?
The Easter Trifle Dessert is a celebration of freshness and creativity, featuring layers of moist cake, creamy whipped cream, and seasonal fruits like strawberries, blueberries, and kiwi. Each layer not only adds flavor but also contributes to the dessert’s visual appeal, making it a standout addition to any Easter table. The combination of textures—from the soft cake to the juicy fruits and light cream—is both satisfying and indulgent.
This trifle has become a staple at Easter gatherings due to its playful yet elegant presentation. It’s versatile enough to suit all ages, from kids who love the bright colors to adults who appreciate the sophisticated flavors. Dive deeper into the history of trifles by visiting the web. For more springtime dessert ideas, browse our selection of spring-inspired recipes here.
3. Ingredients List (Exact Measurements)
To create this stunning Easter Trifle Dessert, gather the following ingredients:
For the Cake Base:
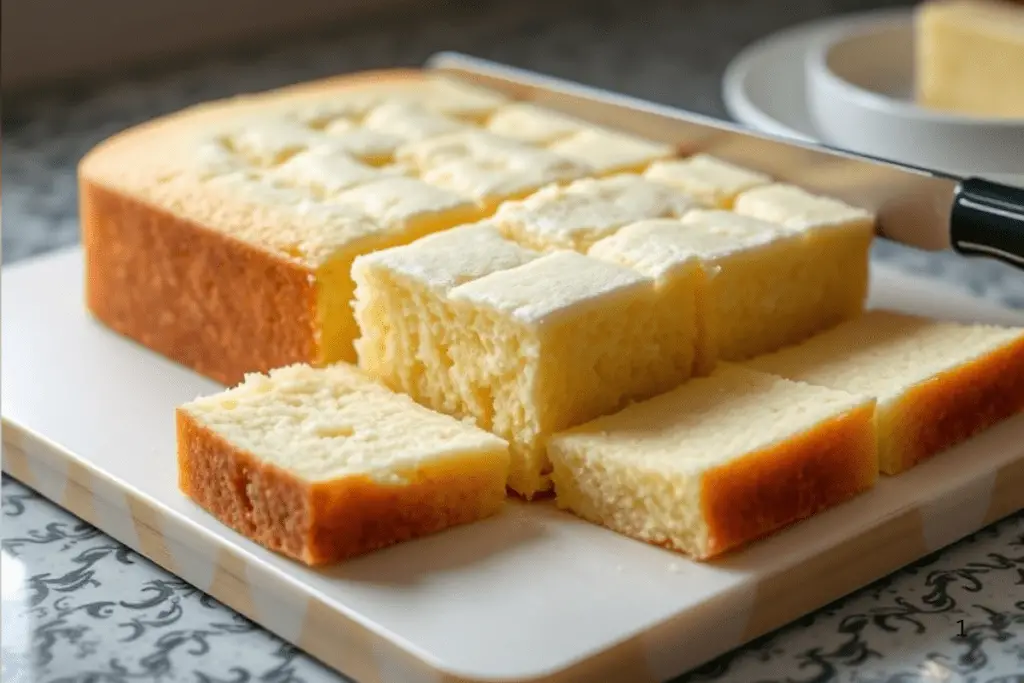
- 1 store-bought pound cake OR angel food cake (or homemade if preferred)
- 1 cup fruit juice (e.g., orange or pineapple juice) for soaking the cake
To the Layers:
- 2 cups fresh strawberries (sliced)
- 1 cup fresh blueberries
- 1 cup fresh kiwi slices
- 1 (14 oz) can sweetened condensed milk
- 2 cups heavy whipping cream
- 1 teaspoon vanilla extract
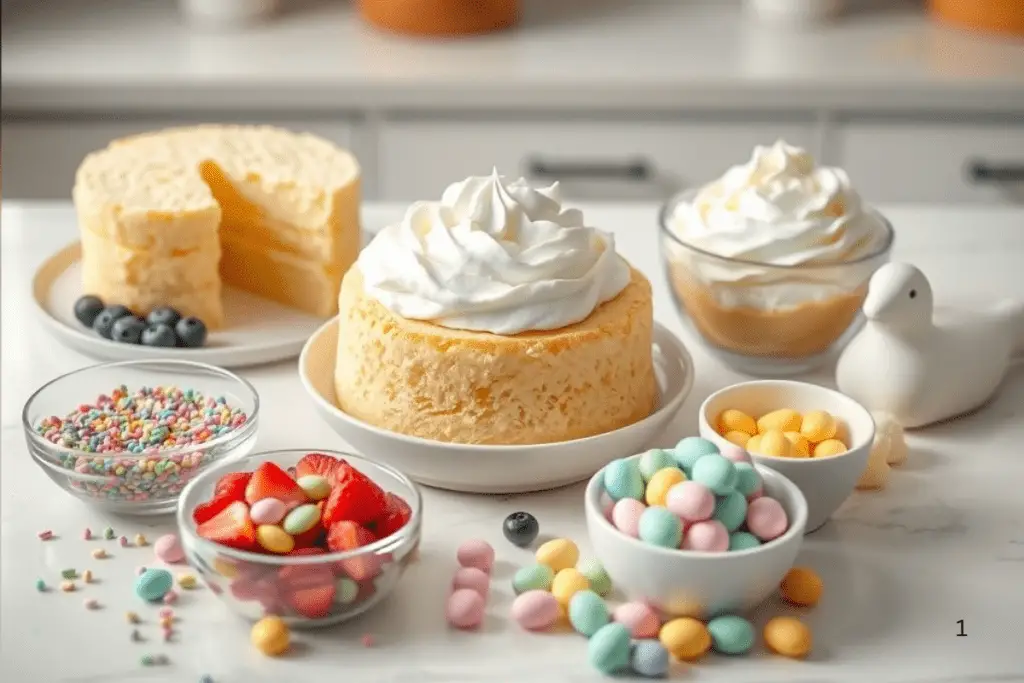
For Garnish:
- Whipped cream
- Sprinkles or edible flowers
- Shredded coconut (optional for added texture)
These simple yet high-quality ingredients ensure your trifle will be as delicious as it is beautiful. For tips on selecting the best fruits, visit our guide on best fruits for spring desserts here.
4. Step-by-Step Instructions
Preparing the Cake Base
Start by cutting your store-bought or homemade pound cake into bite-sized cubes. Place the cubes in a large bowl and drizzle 1 cup of fruit juice evenly over them. Gently toss the cake pieces to ensure they absorb the juice without becoming overly soggy. This step adds moisture and enhances the flavor of the cake base. If using homemade cake, allow it to cool completely before proceeding. For more cake tips, check out our guide on DIY desserts here.
Making the Cream Mixture
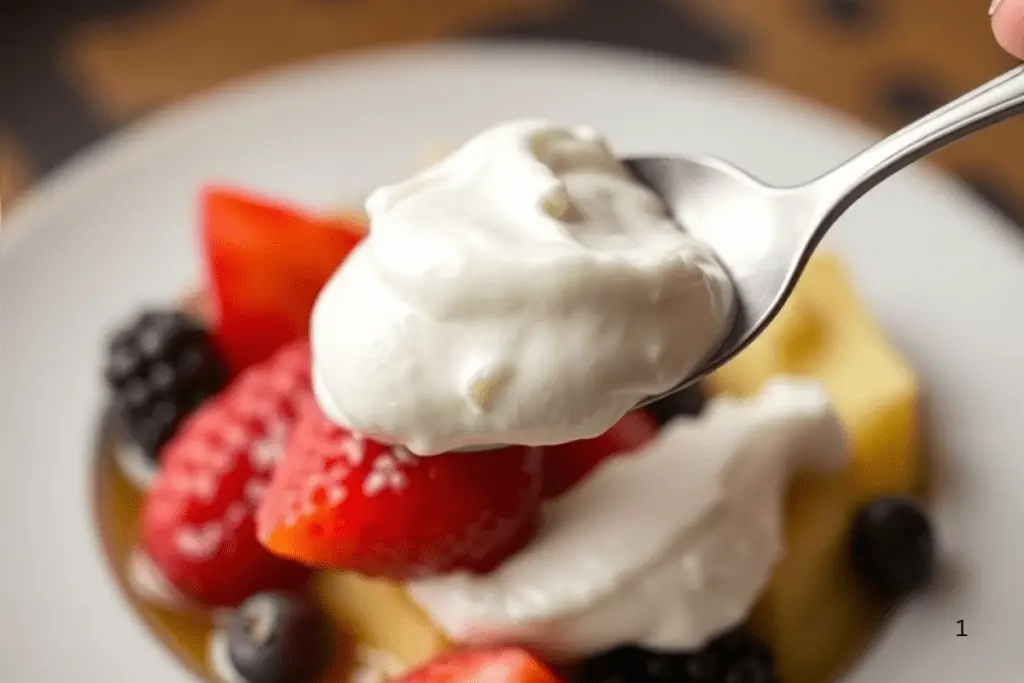
In a large mixing bowl, beat 2 cups of heavy whipping cream until stiff peaks form. Gradually fold in 1 (14 oz) can of sweetened condensed milk and 1 teaspoon of vanilla extract. Mix gently to combine, ensuring the mixture remains light and airy. This creamy layer ties the trifle together, providing a rich contrast to the fresh fruits and cake. For more tips on mastering whipped cream, visit our guide on how to make whipped cream here.
Assembling the Trifle
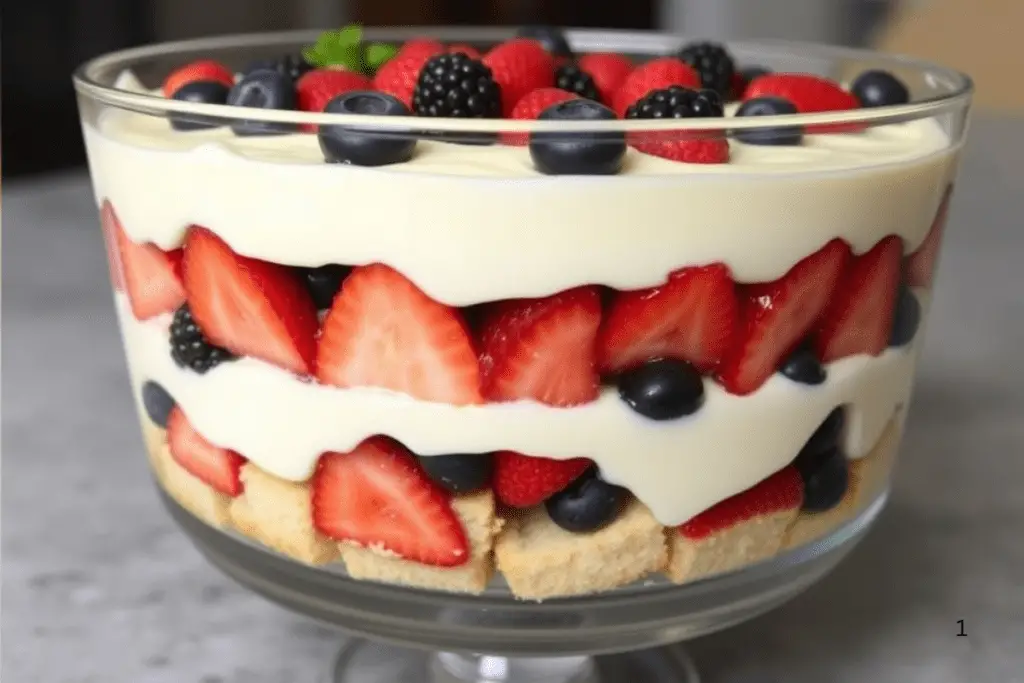
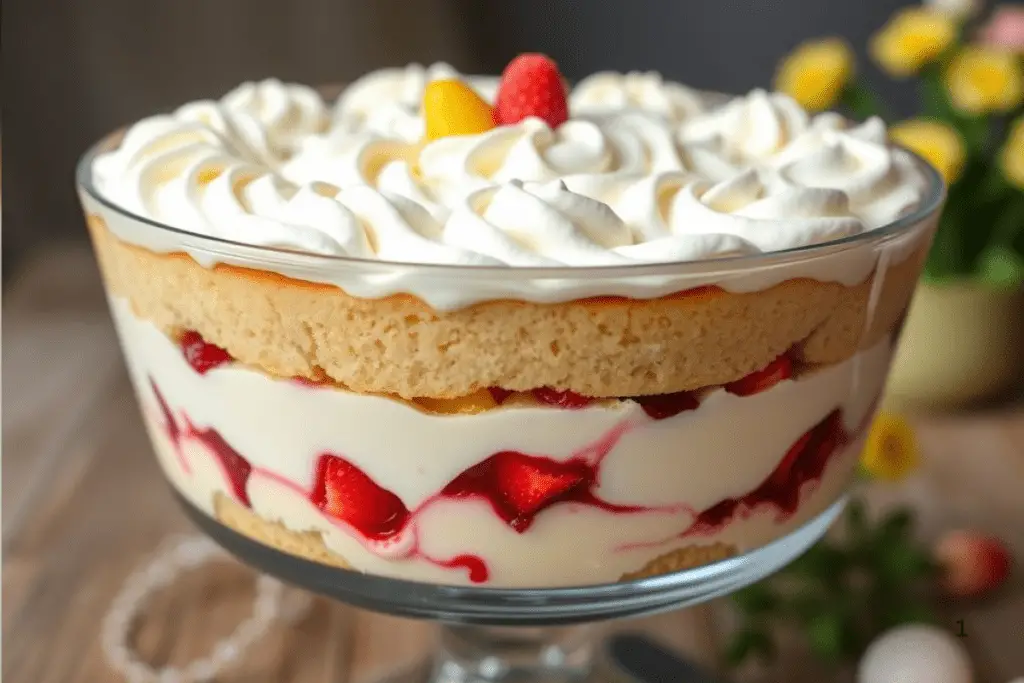
Choose a clear glass bowl or individual serving glasses to showcase the trifle’s layers. Begin by adding a layer of soaked cake cubes at the bottom. Top with a generous layer of sliced strawberries, followed by a dollop of the cream mixture. Repeat the process, alternating layers of cake, fruits (blueberries and kiwi), and cream until the container is filled, finishing with a thick layer of cream on top. Ensure each layer is visible through the glass for maximum visual impact.
Adding the Final Touches
Finish the trifle by decorating the top with a swirl of whipped cream, sprinkles, or edible flowers for a festive touch. Shredded coconut can also be sprinkled around the edges for added texture and color. These final touches elevate the trifle’s appearance and tie it perfectly into the Easter theme. For more decorating inspiration, explore our guide on holiday desserts here.
5. Decorating the Trifle
Transform your Easter Trifle Dessert into a work of art by incorporating pastel-colored fruits and creative arrangements. Use strawberries, blueberries, and kiwis to enhance the Easter theme, arranging them in patterns or sections for a visually striking result. Add sprinkles or edible flowers in coordinating colors to complement the vibrant layers below.
To make your trifle Instagram-worthy, focus on symmetry and balance. Consider placing larger fruits like strawberry halves near the center and filling gaps with smaller berries or kiwi slices. A dusting of shredded coconut mimics “Easter grass” and adds a professional touch. For more ideas on festive decor, check out our guide on party foods here.
6. Serving Suggestions
This Easter Trifle Dessert pairs beautifully with other holiday favorites like glazed ham, scalloped potatoes, or roasted vegetables. It’s perfect for serving at Easter brunches, family dinners, or kids’ parties, where its playful appearance is sure to delight guests of all ages. To store leftovers, cover the trifle tightly with plastic wrap and refrigerate for up to 2 days. Assemble most of the trifle ahead of time and add fresh toppings just before serving to maintain their vibrancy. For more Easter-themed dishes, browse our collection of holiday recipes here.
7. Variations and Substitutions
This recipe is highly adaptable to suit various dietary needs:
- Gluten-Free Option: Substitute the pound cake with gluten-free cake or cookies for a safe alternative.
- Vegan Alternative: Use coconut whipped cream and dairy-free cake or brownies for a plant-based version.
- Seasonal Fruits: Swap out fruits based on availability or preference—mango, raspberries, or peaches work well.
These variations ensure everyone can enjoy this festive trifle. For more customization ideas, explore our trifle recipes here.
8. Nutritional Information
Each serving of this Easter Trifle Dessert contains approximately 300 calories, depending on the ingredients used. Here’s the macronutrient breakdown per serving:
- Carbohydrates: 40g
- Fats: 15g
- Proteins: 5g
Please note that these values may vary slightly based on substitutions or portion sizes. Enjoy responsibly!
9. FAQs Section
Here are answers to some common questions about this trifle:
Q: Can I make this trifle ahead of time?
Yes! Assemble it up to 24 hours in advance and refrigerate until ready to serve. Add fresh fruit garnishes just before serving to keep them vibrant.
Q: What can I use instead of cake?
Ladyfingers, brownies, or even cookies work well as substitutes for the cake base.
Q: Do I have to use sweetened condensed milk?
No, you can substitute it with a mix of sugar and regular milk for a lighter version.
Q: How do I prevent the layers from getting soggy?
Add the fruit just before serving or use slightly less juice when soaking the cake to maintain texture.
10. Conclusion
Creating this Easter Trifle Dessert is a fun and effortless way to celebrate the joy of spring and the magic of Easter. With its vibrant colors, fresh flavors, and customizable options, it’s a dish that delights both kids and adults alike. Whether you’re hosting a holiday gathering, treating your family, or simply indulging in some seasonal creativity, this trifle is sure to bring smiles all around.
We’d love to see your creations! Share your photos on social media using the hashtag #EasterTrifleMagic and tag us for a chance to be featured. Have feedback or questions? Leave a comment below—we’re here to help! For more holiday inspiration, explore our collection of seasonal recipes here. Happy entertaining!
Print
Homemade easter trifle dessert recipe
This Easter Trifle Dessert is a stunning, no-bake layered treat that combines fluffy cake, creamy pudding, whipped topping, and fresh fruit. It’s perfect for spring gatherings and easy to customize with pastel colors, festive toppings, and your favorite flavors!
- Total Time: 45 minutes
- Yield: 6–8 servings 1x
Ingredients
For the Layers:
- 1 store-bought or homemade pound cake (cut into cubes)
- 1 box (3.4 oz) vanilla pudding mix (or homemade custard)
- 2 cups milk (for pudding mix)
- 1 ½ cups whipped cream (or whipped topping)
- 1 cup strawberries (sliced)
- 1 cup blueberries
- 1 cup pastel-colored sprinkles or Easter candies
For Garnishing:
- Crushed shortbread cookies (for “bunny dirt” effect)
- Mini chocolate eggs
- Peeps marshmallow bunnies or chicks
- Extra whipped cream
Instructions
Step 1: Prepare the Cake and Pudding
- Cube the Cake: Cut the pound cake into bite-sized cubes.
- Make the Pudding: Whisk the vanilla pudding mix with 2 cups of milk and let it set in the fridge for 5 minutes.
Step 2: Assemble the Trifle
- Layer 1: Place a layer of cake cubes at the bottom of a trifle dish or individual cups.
- Layer 2: Add a layer of vanilla pudding on top.
- Layer 3: Sprinkle a handful of strawberries and blueberries for freshness.
- Layer 4: Spread a fluffy layer of whipped cream.
- Repeat layers until you reach the top of the dish.
Step 3: Decorate for Easter
- Sprinkle the top with crushed shortbread cookies (to look like sandy “bunny dirt”).
- Add mini chocolate eggs, pastel sprinkles, or Peeps marshmallows for a festive look.
- Pipe extra whipped cream for added flair.
Step 4: Chill and Serve
- Let the trifle chill for at least 30 minutes before serving to allow the flavors to meld.
- Serve with a spoon and watch it disappear at your Easter gathering!
Notes
- Make-Ahead Friendly: Prepare up to 24 hours in advance and keep refrigerated.
- Flavor Variations: Try lemon pudding instead of vanilla for a citrusy twist!
- Lighter Option: Use angel food cake instead of pound cake for a lower-calorie version.
- Gluten-Free: Swap for gluten-free cake or ladyfingers.
- Prep Time: 15 minutes
- Cook Time: 30 minutes
- Category: Dessert
- Method: No-Bake
- Cuisine: American
- Diet: Vegetarian