
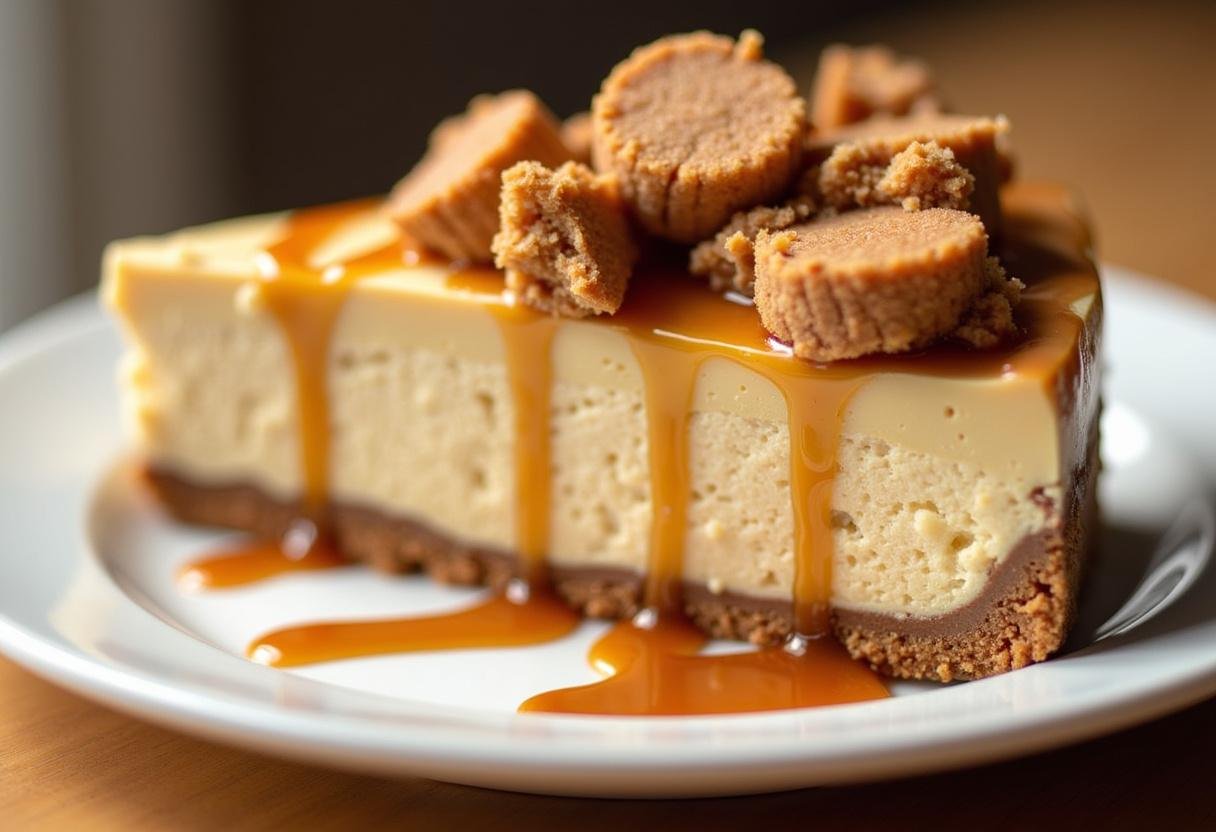
Peanut Butter Butterfinger Cheesecake: A Decadent No-Bake Delight That Will Steal the Show 🍰🥜🍫✨
1. Introduction
Get ready to fall in love with the ultimate no-bake dessert – this showstopping Peanut Butter Butterfinger Cheesecake! Imagine layers of creamy peanut butter cheesecake filling, a buttery graham cracker crust, and the irresistible crunch of Butterfinger candy pieces throughout. What makes this easy butterfinger cheesecake truly special is how simple it is to make – no oven required, just a handful of ingredients, and minimal prep time. Perfect for potlucks, birthday parties, or when you need an impressive dessert without the fuss, this no-bake butterfinger dessert will quickly become your signature sweet treat. If you love easy cheesecake recipes as much as we do, you’ll want to check out our collection of no-bake cheesecake recipes for more delicious inspiration!
2. Ingredients You’ll Need
One of the best things about this simple peanut butter cheesecake is that it uses basic ingredients you might already have in your pantry. Here’s what you’ll need to create this magical dessert:
- 1 ½ cups graham cracker crumbs – the perfect buttery base (try our graham cracker crust variations for different flavors)
- 6 tbsp melted butter – binds the crust together
- 16 oz cream cheese, softened – use full-fat for the creamiest texture
- 1 cup creamy peanut butter – the star ingredient that gives this cheesecake its rich flavor
- 1 (14 oz) can sweetened condensed milk – adds sweetness and helps set the filling
- 1 tsp vanilla extract – enhances all the flavors
- 1 ½ cups crushed Butterfinger candy bars (plus extra for garnish) – for that signature crunch
- Whipped cream and caramel sauce (optional, for topping) – takes it over the top!
Pro Tip: For an extra special touch, try drizzling with our chocolate glaze recipe instead of caramel!
3. Step-by-Step Instructions for Perfect Results
Step 1: Prepare the Perfect Crust
In a medium bowl, combine the graham cracker crumbs with melted butter until the mixture resembles wet sand. The butter should evenly coat all the crumbs – this is what gives your easy butterfinger cheesecake that perfect firm yet crumbly base. Press the mixture firmly into the bottom of a 9-inch springform pan using the back of a measuring cup or glass. Chilling the crust while you prepare the filling helps it set properly. For more crust ideas, check out our cheesecake bar recipes with different crust variations!
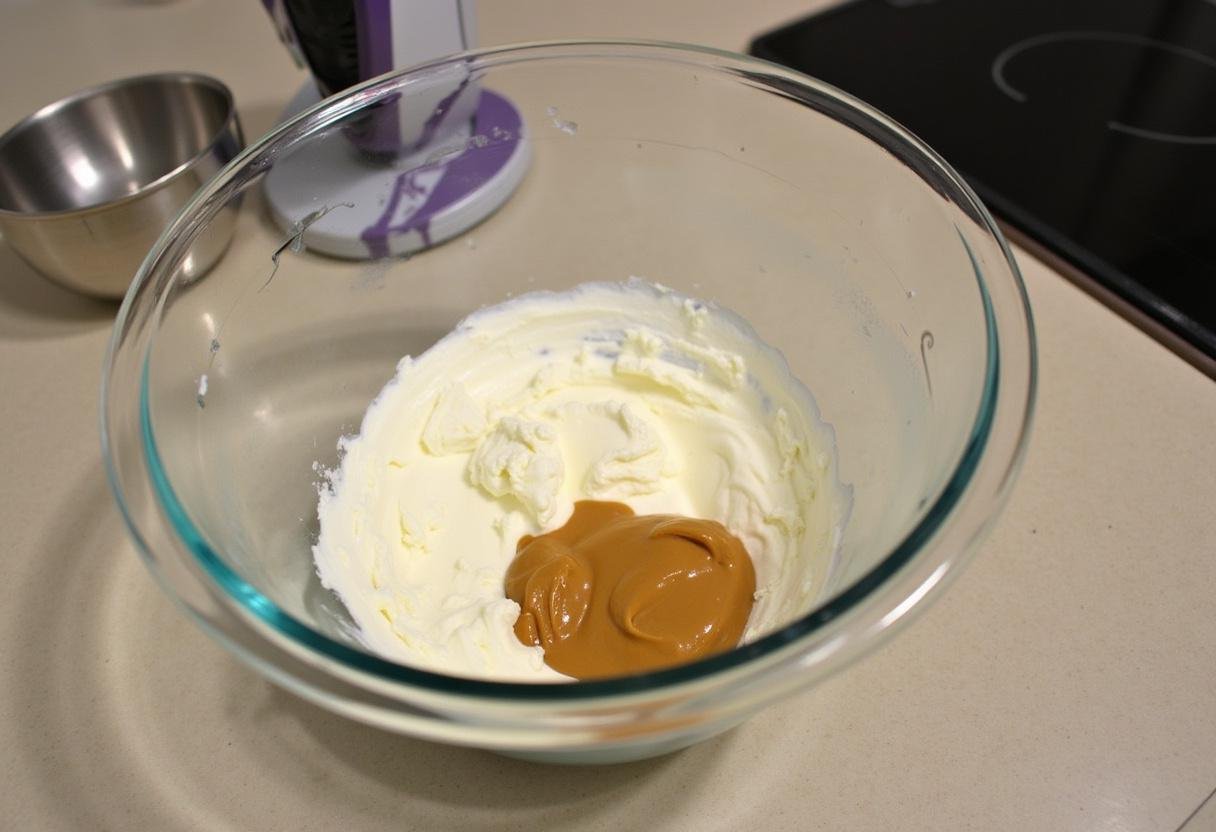
Step 2: Create the Luxurious Filling
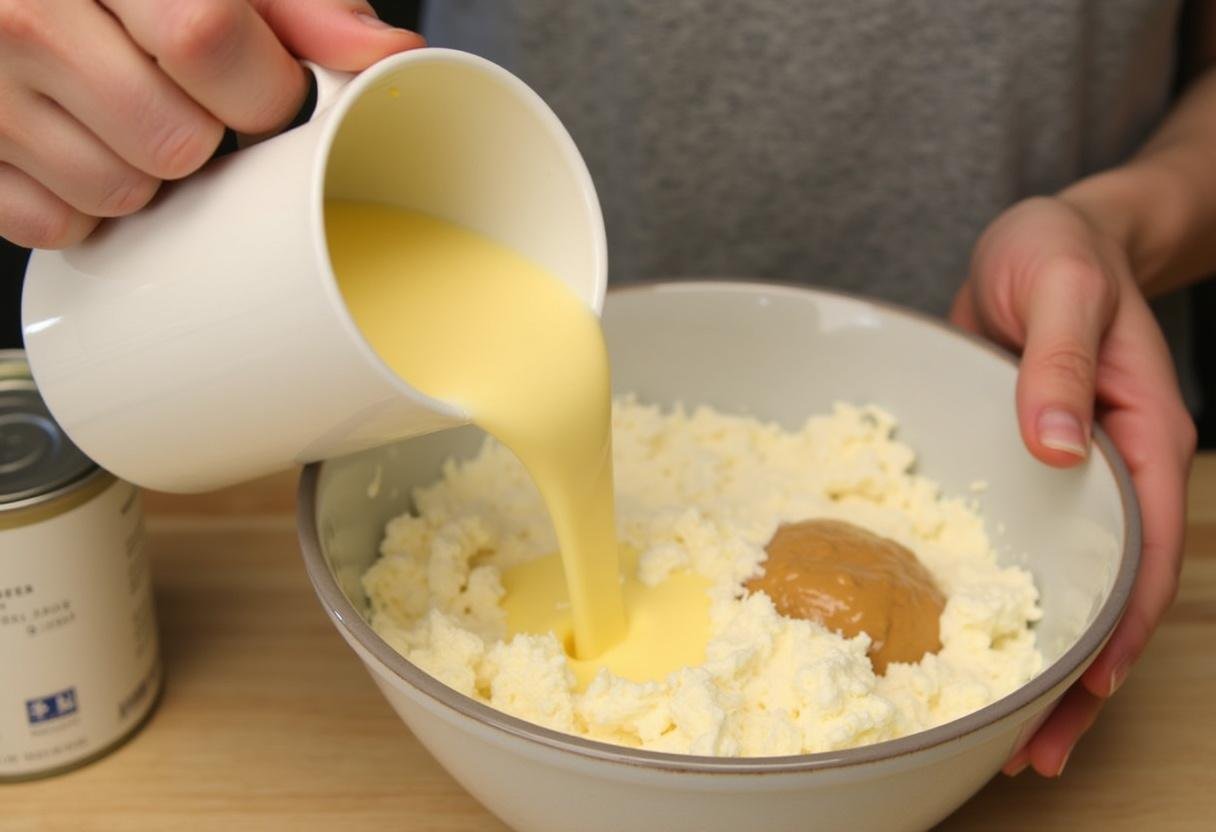
In a large mixing bowl, beat the softened cream cheese and peanut butter together until completely smooth and creamy – about 2-3 minutes with an electric mixer. This step is crucial for avoiding lumps in your simple peanut butter cheesecake. Gradually add the sweetened condensed milk and vanilla extract, mixing on low speed until fully incorporated. The mixture should be thick but spreadable. If you enjoy no-bake desserts, you might also love our no-bake lemon blueberry dessert for a fruity alternative!
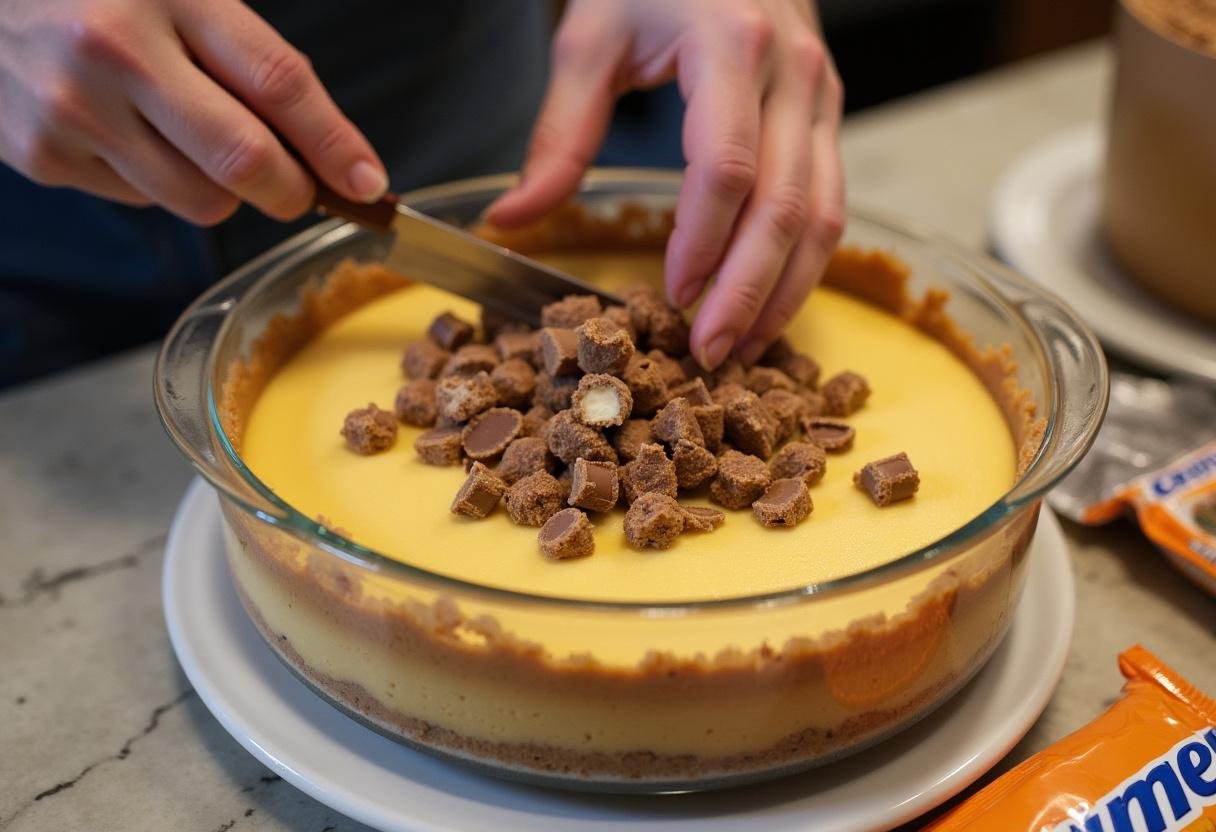
Step 3: Incorporate the Butterfinger Magic
Now for the fun part! Gently fold in the crushed Butterfinger candy bars using a rubber spatula, reserving about ¼ cup for garnish. The key is to distribute the candy evenly while maintaining some larger pieces for texture. Pour the luscious filling over your chilled crust and smooth the top with an offset spatula. For another candy-inspired treat, try our Easter candy cookies that use similar ingredients!
Step 4: The Final Touches
Refrigerate your no-bake butterfinger dessert for at least 4 hours, though overnight is ideal for the best texture. When ready to serve, run a knife around the edge of the springform pan before releasing the sides. Top with whipped cream, the reserved Butterfinger pieces, and a generous drizzle of caramel sauce. For more topping ideas, this external resource has some creative suggestions!
4. Pro Tips for the Best Peanut Butter Butterfinger Cheesecake
- Temperature matters: Make sure your cream cheese is fully softened to room temperature for a lump-free filling.
- Candy crushing technique: Place Butterfinger bars in a zip-top bag and crush with a rolling pin for evenly sized pieces.
- Presentation perfection: For clean slices, dip your knife in hot water and wipe between cuts.
- Make ahead magic: This easy butterfinger cheesecake actually tastes better the next day as flavors meld.
- Seasonal twist: Try our pumpkin spice version for fall by adding ½ cup pumpkin puree and spices to the filling.
5. Delicious Variations to Try
- Chocolate Lover’s Dream: Add ¼ cup cocoa powder to the crust or swirl melted chocolate into the filling before chilling.
- Nut-Free Version: Substitute peanut butter with sunflower seed butter and use a different candy bar.
- Mini Cheesecakes: Use a muffin tin with liners for adorable individual servings – perfect for parties!
- S’mores Twist: Add mini marshmallows and graham pieces inspired by our sheet pan s’mores recipe.
- Fruit Fusion: Top with sliced bananas or strawberries for a fresh contrast.
6. Serving Suggestions That Wow
This simple peanut butter cheesecake is spectacular on its own, but here are some ways to make it even more special:
- Serve with a scoop of vanilla bean ice cream for an à la mode experience
- Pair with our chocolate chia pudding for a dessert duo
- Drizzle with both caramel and chocolate sauces for a “turtle” effect
- Garnish with our strawberry kiss cookies for a colorful presentation
- Serve alongside coffee or espresso for an after-dinner treat
7. Storage Instructions
Store any leftovers (if you have any!) in an airtight container in the refrigerator for up to 5 days. For longer storage, you can freeze individual slices wrapped tightly in plastic wrap and foil for up to 2 months. Thaw overnight in the refrigerator before serving. The texture may be slightly denser after freezing but still delicious.
8. Frequently Asked Questions
Q: Can I use natural peanut butter in this recipe?
A: We don’t recommend natural peanut butter as the oil separation can affect the texture of your no-bake butterfinger dessert. Stick with conventional creamy peanut butter for best results.
Q: My cheesecake seems too soft – what went wrong?
A: This usually means it didn’t chill long enough. Make sure to refrigerate for at least 4 hours, or try freezing for 1 hour before serving for a firmer texture.
Q: Can I make this without a springform pan?
A: Yes! You can use a 9×9 square baking dish lined with parchment paper for easy removal. The slices won’t be as pretty but will taste just as amazing.
Q: How far in advance can I make this?
A: This easy butterfinger cheesecake actually tastes better made 1-2 days ahead as the flavors develop. Just add fresh toppings before serving.
9. Final Thoughts
This Peanut Butter Butterfinger Cheesecake is truly a dessert lover’s dream come true – combining the rich, creamy goodness of peanut butter cheesecake with the irresistible crunch of Butterfinger candy in every bite. What makes it even better is how simple it is to prepare – no baking, no complicated techniques, just pure deliciousness waiting in your refrigerator. Whether you’re serving it at a special occasion or just treating yourself, this no-bake butterfinger dessert is guaranteed to impress. The contrast of textures and flavors makes it unforgettable, and the minimal effort required makes it a recipe you’ll turn to again and again. So grab your ingredients and get ready to make the easiest, most impressive cheesecake of your life! 🎉🍽️
Print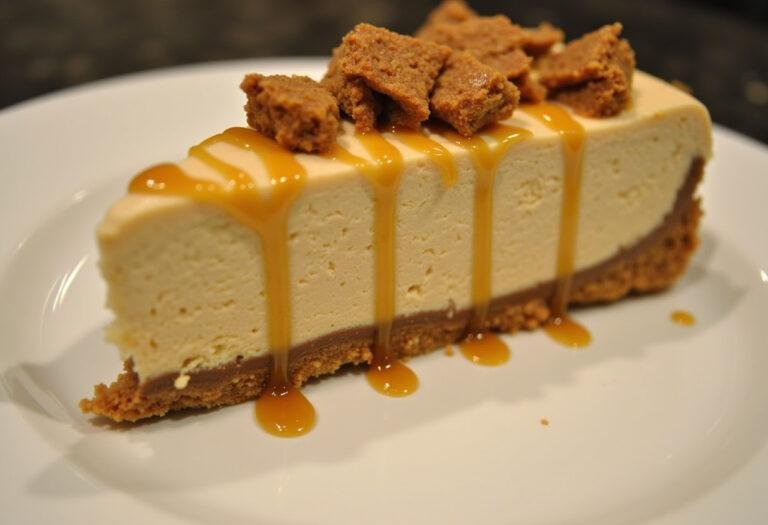
Peanut Butter Butterfinger Cheesecake Recipe with Minimal Ingredients
Indulge in the ultimate no-bake dessert with this Peanut Butter Butterfinger Cheesecake! Creamy, rich, and packed with the irresistible crunch of Butterfinger candy, this easy cheesecake requires minimal ingredients and zero oven time. Perfect for potlucks, parties, or a sweet treat at home, this simple peanut butter cheesecake will become your go-to dessert.
- Total Time: 4 hours 15 minutes
Ingredients
- 1 ½ cups graham cracker crumbs
- 6 tbsp melted butter
- 16 oz cream cheese, softened
- 1 cup creamy peanut butter
- 1 (14 oz) can sweetened condensed milk
- 1 tsp vanilla extract
- 1 ½ cups crushed Butterfinger candy bars (plus extra for garnish)
- Whipped cream and caramel sauce (optional, for topping)
Instructions
- Prepare the Crust: Mix graham cracker crumbs with melted butter until well combined. Press firmly into the bottom of a 9-inch springform pan. Chill in the fridge while preparing the filling.
- Make the Cheesecake Filling: In a large bowl, beat softened cream cheese and peanut butter until smooth and creamy. Gradually add sweetened condensed milk and vanilla, mixing until fully incorporated.
- Fold in the Butterfinger Candy: Gently fold in the crushed Butterfinger candy bars, reserving some for topping. Pour the mixture over the chilled crust and spread evenly.
- Chill and Garnish: Refrigerate for at least 4 hours (or overnight) until set. Before serving, top with whipped cream, extra Butterfinger pieces, and a drizzle of caramel sauce if desired.
Notes
- Use full-fat cream cheese for the creamiest texture.
- Crush Butterfinger bars into small chunks for even distribution.
- For a firmer cheesecake, freeze for 1 hour before serving.
- Drizzle with melted chocolate for extra decadence.
- Prep Time: 15 minutes
- Cook Time: 0 minutes
Nutrition
- Serving Size: 1 slice
- Calories: 480 Kcal
- Sugar: 32g
- Sodium: 320mg
- Fat: 32g
- Saturated Fat: 14g
- Unsaturated Fat: 12g
- Trans Fat: 0g
- Carbohydrates: 40g
- Fiber: 2g
- Protein: 10g
- Cholesterol: 55mg
2 thoughts on “Peanut Butter Butterfinger Cheesecake Recipe with Minimal Ingredients”