
Quick and Simple Mummy Oreo Balls Recipe for Halloween Fun 👻🍬🎃
1. Introduction
Get ready to spookify your Halloween with a delightful and easy treat! These Quick and Simple Mummy Oreo Balls are the perfect no-bake dessert to impress your friends and family. Combining the classic taste of Oreo cookies with a creamy filling and a spooky mummy design, these Halloween Oreo balls are a guaranteed hit at any Halloween party. Forget spending hours in the kitchen; this recipe is all about quick and easy fun. If you’re looking for more effortless and delicious treats, check out our Oreo Mud Pie for another simple, crowd-pleasing dessert. In this article, you’ll discover how to make these adorable easy Halloween desserts using just a few simple ingredients. So, gather your supplies, and let’s create some deliciously spooky Mummy Oreo truffles that even the pickiest ghouls will love! Whether you’re looking for a fun activity with kids or a last-minute treat, these no-bake Oreo treats are the answer. Let the Halloween baking adventure begin!
2. What are Mummy Oreo Balls?
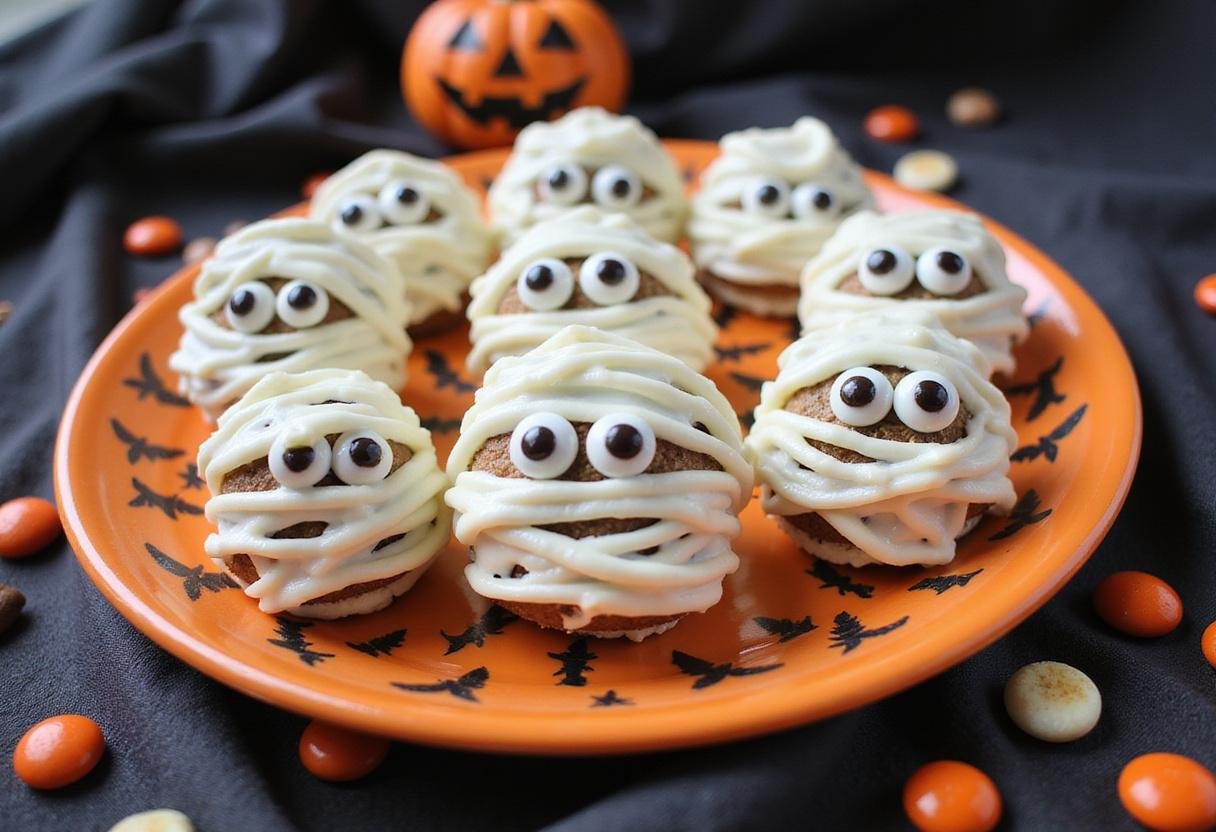
Mummy Oreo balls are a festive twist on the classic Oreo truffle, perfect for Halloween. These easy Halloween desserts consist of crushed Oreo cookies mixed with cream cheese, rolled into balls, and then dipped in melted white chocolate. The final touch is the decoration: white chocolate drizzles to resemble mummy wrappings and candy eyeballs, transforming ordinary Oreo balls into spooky, edible mummies. These no-bake Oreo treats are not only delicious but also incredibly fun to make, making them a popular choice for Halloween parties and family gatherings. The combination of the crunchy Oreo and creamy filling, coated in sweet white chocolate, makes these Halloween Oreo balls irresistible. For another creamy, no-bake delight, you might also enjoy our Biscoff Cookie Butter Cheesecake!
3. Why You’ll Love This Recipe
This recipe for Mummy Oreo truffles is a winner for several reasons. Firstly, it’s incredibly simple and requires no baking, making it perfect for busy schedules or when you need a quick and impressive dessert. Secondly, it’s a fantastic activity to do with kids, allowing them to get creative with decorating the mummies. Thirdly, the taste is undeniably delicious – the creamy, chocolatey flavor is a crowd-pleaser every time. If you’re catering to a crowd, you’ll definitely appreciate how quickly these come together! Additionally, these easy Halloween desserts are customizable; you can use different types of Oreos or add food coloring to the white chocolate for a unique twist. For another customizable dessert, check out our Easter Chocolate Lasagna – perfect for adapting to any holiday! Lastly, these no-bake Oreo treats are always a hit at Halloween parties, adding a fun and spooky element to your dessert table. The ease of preparation and guaranteed deliciousness make these Halloween Oreo balls a must-try this Halloween season.
4. Ingredients You’ll Need
To create these delightful Mummy Oreo balls, you’ll need just a handful of simple ingredients:
- Oreo Cookies: The star of the show! Regular or double-stuffed Oreos work perfectly for these easy Halloween desserts.
- Cream Cheese: This binds the crushed Oreos together, creating a smooth and creamy center for your Halloween Oreo balls. Like cheesecake? Perhaps the mini banana pudding cheesecakes recipes is great for you.
- White Chocolate: Used for coating the Oreo balls and creating the mummy wrappings on these Mummy Oreo truffles.
- Candy Eyeballs: These add the perfect spooky touch, turning your Oreo balls into adorable mummies for memorable no-bake Oreo treats. Not into eyes? Feel free to change it!
5. Equipment You’ll Need
Gather these essential tools to make the process smooth and enjoyable:
- Food Processor (optional): For easy and quick Oreo crushing, although a zip-top bag and rolling pin work just as well for these easy Halloween desserts. Don’t have a food processor? No worries!
- Mixing Bowl: To combine the crushed Oreos and cream cheese for your Halloween Oreo balls.
- Baking Sheet: To place the finished Oreo balls while the chocolate sets, ensuring your Mummy Oreo truffles stay in perfect shape. Want to try some pie, take a look at this giant reeses peanut butter cup pie
- Parchment Paper: To line the baking sheet, preventing the Oreo balls from sticking. Essential for stress-free no-bake Oreo treats.
- Microwave-Safe Bowl: For melting the white chocolate used on the Halloween Oreo balls.
- Fork or Dipping Tools: For coating the Oreo balls evenly with white chocolate, creating delightful Mummy Oreo truffles.
6. Step-by-Step Instructions
Step 1: Prepare the Oreo Mixture
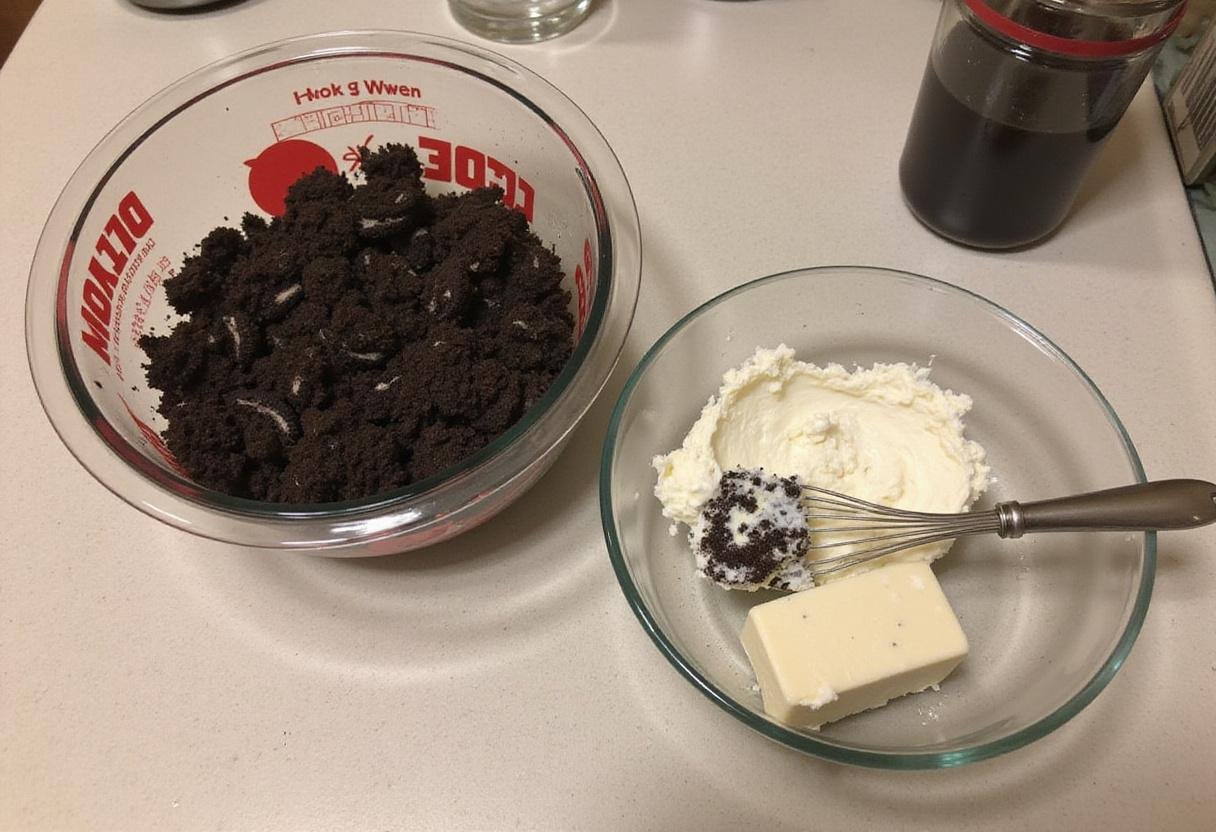
Begin by crushing the Oreo cookies into fine crumbs. You can use a food processor for a quick and even crush, or place the cookies in a zip-top bag and crush them with a rolling pin. In a mixing bowl, combine the crushed Oreos with softened cream cheese. Mix until well combined, forming a dough-like consistency perfect for these easy Halloween desserts.
Step 2: Roll into Balls
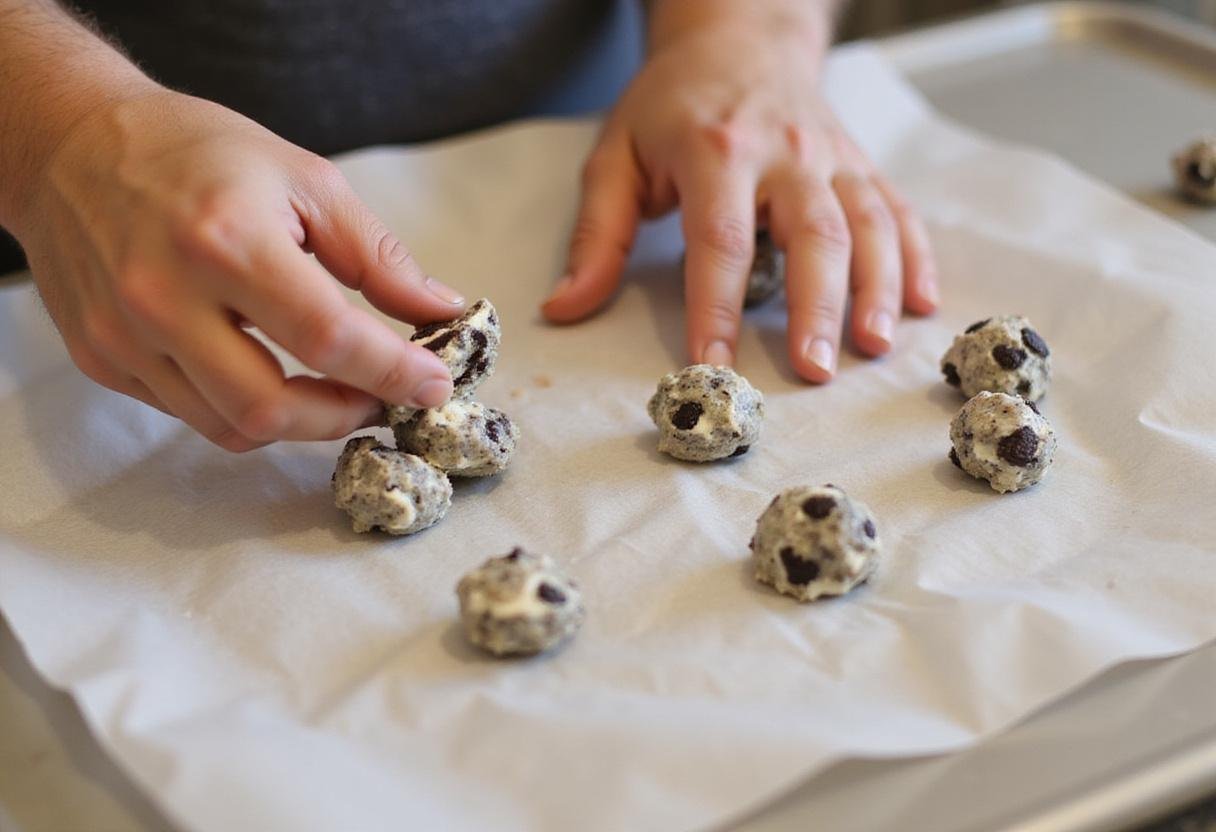
Take small portions of the Oreo mixture and roll them into balls, approximately 1 inch in diameter. Place the Oreo balls on a baking sheet lined with parchment paper. This step is crucial for creating the base of your Halloween Oreo balls. Once all the balls are formed, place the baking sheet in the freezer for about 30 minutes to allow them to firm up, making the dipping process easier for your Mummy Oreo truffles. Want other options? Take a look at this strawberry shortcake cheesecake rolls
Step 3: Melt the White Chocolate
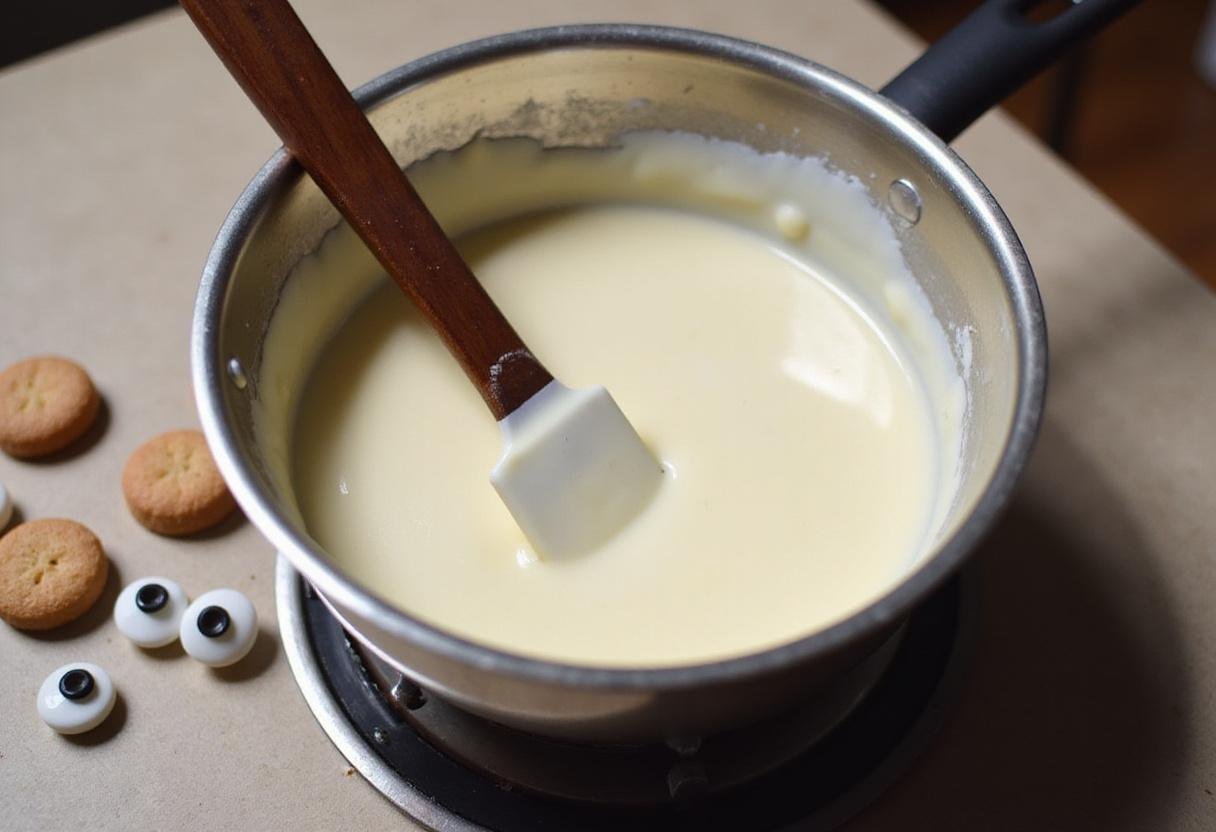
In a microwave-safe bowl, melt the white chocolate in 30-second intervals, stirring in between, until smooth and completely melted. Be careful not to overheat the chocolate, as it can seize up. For more tips on melting chocolate perfectly (as well as for another take on mummies!), you might find this tutorial helpful. This melted chocolate will be the key element for turning your Oreo balls into Mummy Oreo truffles. Prepare your dipping station to ensure these no-bake Oreo treats are perfectly coated.
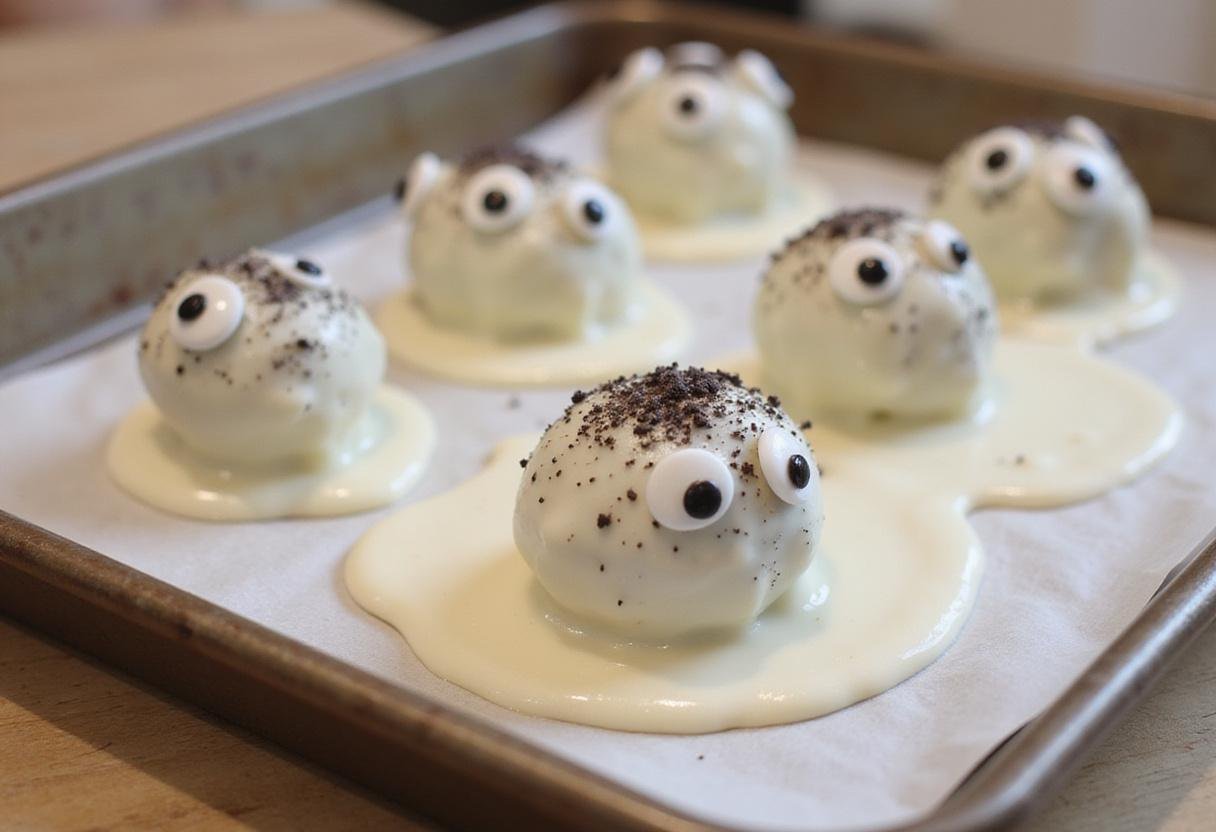
Step 4: Decorate as Mummies
Remove the Oreo balls from the freezer. Dip each ball into the melted white chocolate, ensuring it is fully coated. Place the dipped Oreo ball back on the parchment-lined baking sheet. Before the chocolate sets, drizzle additional white chocolate over the top in a zig-zag pattern to create the mummy wrappings. Add two candy eyeballs to each ball to complete the mummy face. Allow the chocolate to set completely before serving these spooky and delicious Halloween Oreo balls.
7. Tips and Tricks for Perfect Oreo Balls
- Ensure the cream cheese is fully softened to create a smooth and creamy mixture for your Halloween Oreo balls.
- Chill the Oreo balls in the freezer before dipping to prevent them from falling apart in the melted chocolate, crucial for making perfect Mummy Oreo truffles.
- Use high-quality white chocolate for the best flavor and smoothest coating on these easy Halloween desserts.
- If the melted chocolate becomes too thick, add a teaspoon of vegetable oil to thin it out for easy dipping of these no-bake Oreo treats.
- Get creative with your mummy designs! Use different patterns for the white chocolate drizzles to make each mummy unique. If this recipes is great, check out all our recipes to try at home.
8. Variations and Add-Ins
- Use different flavors of Oreos, such as golden Oreos or mint Oreos, to create unique easy Halloween desserts.
- Add a drop of food coloring to the white chocolate to create colorful mummy wrappings for your Halloween Oreo balls.
- Sprinkle crushed nuts or sprinkles over the white chocolate before it sets for added texture and flavor to these Mummy Oreo truffles. Consider using chopped pecans—a taste of our Pecan Pie Lasagna, but in mummy form!
- Insert a pretzel stick into each Oreo ball before dipping to create a “mummy on a stick” for a fun twist on these no-bake Oreo treats.
9. Conclusion
These Quick and Simple Mummy Oreo Balls are the perfect addition to your Halloween festivities. Easy to make and delightfully spooky, they’re sure to be a hit with both kids and adults. With just a few ingredients and simple steps, you can create these adorable Halloween Oreo balls that capture the spirit of the season. So, this Halloween, skip the complicated recipes and embrace the simplicity and fun of these Mummy Oreo truffles. Enjoy your delicious and spooky easy Halloween desserts! These no-bake Oreo treats are a fantastic way to add some festive cheer to your celebration.
Print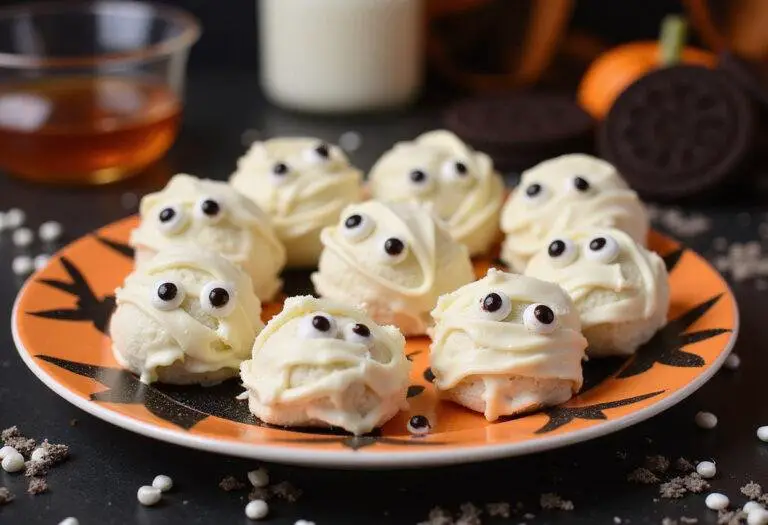
Quick and Simple Mummy Oreo Balls Recipe for Halloween Fun
Get ready to spookify your Halloween with these Quick and Simple Mummy Oreo Balls! Perfect for entertaining guests, these delicious no-bake treats combine the classic taste of Oreo cookies with a creamy filling and a festive mummy design, ensuring they are a hit at any Halloween gathering.
- Total Time: 45 minutes
- Yield: 24 Mummy Oreo Balls 1x
Ingredients
- 1 package Oreo Cookies
- 8 oz Cream Cheese, softened
- 2 cups White Chocolate, melted
- Candy Eyeballs for decoration
Instructions
- Crush the Oreo cookies into fine crumbs and mix with softened cream cheese until dough-like consistency forms.
- Roll the mixture into 1-inch balls and place on a baking sheet lined with parchment paper; freeze for 30 minutes.
- Melt white chocolate in a microwave-safe bowl until smooth.
- Dip each chilled Oreo ball into melted white chocolate, drizzle with more chocolate, and add candy eyeballs for decoration.
- Allow chocolate to set completely before serving.
Notes
- Use high-quality white chocolate for the best coating.
- Chill the mixture for easier rolling.
- Experiment with different Oreo flavors for variety.
- Add food coloring to white chocolate for colorful designs.
- Prep Time: 15 minutes
- Cook Time: 30 minutes (for chilling)
- Category: Dessert
- Method: No-Bake
- Cuisine: American
- Diet: Vegetarian
Nutrition
- Serving Size: 1 ball
- Calories: 120 Kcal
- Sugar: 9g
- Sodium: 50mg
- Fat: 7g
- Saturated Fat: 4g
- Unsaturated Fat: 2g
- Trans Fat: 0g
- Carbohydrates: 13g
- Fiber: 0g
- Protein: 1g
- Cholesterol: 5mg