Red Velvet Cheesecake Balls: A Decadent No-Bake Dessert 


Table of contents
1. Introduction
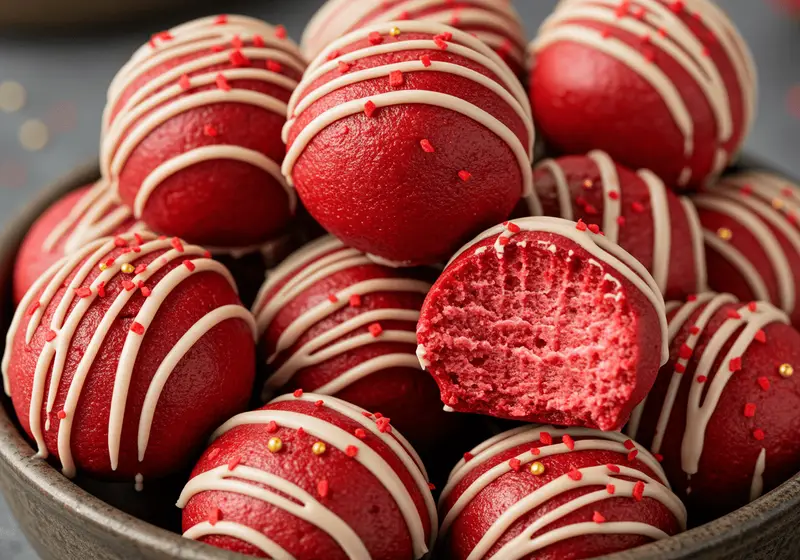
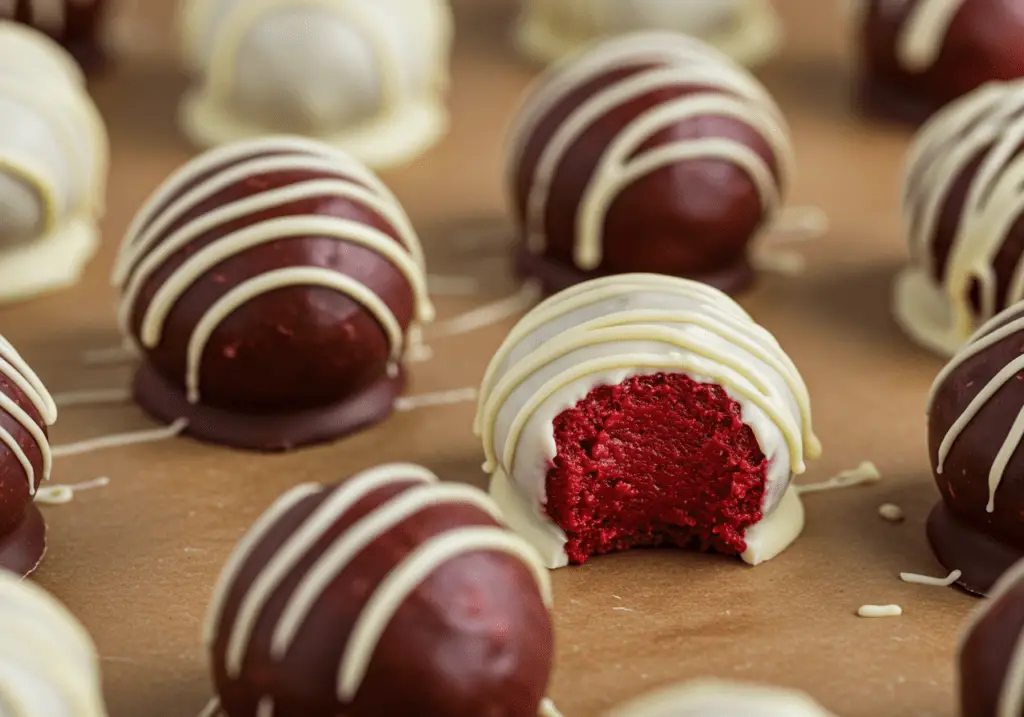
Step into the world of decadent desserts with these Red Velvet Cheesecake Balls, a no-bake treat that combines the rich flavors of red velvet cake and creamy cheesecake into bite-sized perfection. These velvety, chocolate-coated delights are as easy to make as they are irresistible, making them a perfect choice for celebrations, holidays, or simply indulging your sweet tooth. Their vibrant red color and festive appearance make them an ideal addition to themed parties, potlucks, or even as thoughtful gifts for loved ones.
Dive deeper into the origins of red velvet cake by visiting this link. For tips on achieving smooth, glossy chocolate coatings, check out our guide on melting chocolate here.
2. What Are Red Velvet Cheesecake Balls?
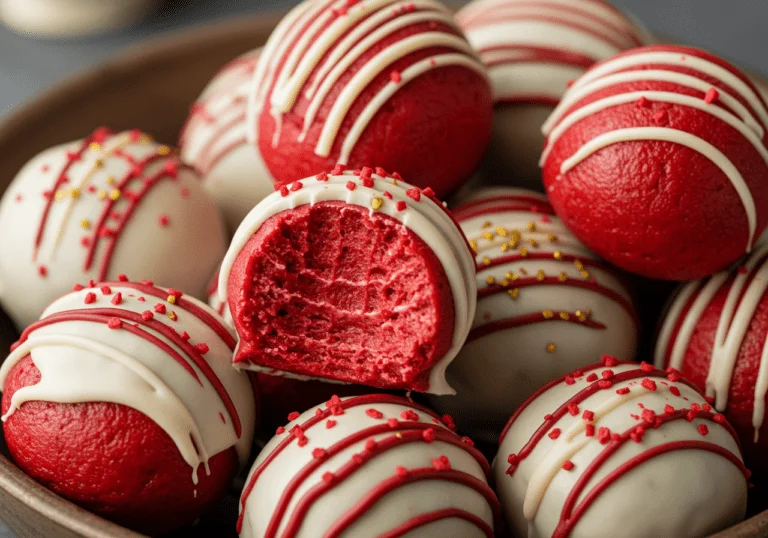
Red Velvet Cheesecake Balls are a delightful fusion of two classic desserts: the rich, cocoa-infused flavors of red velvet cake and the creamy indulgence of cheesecake. These bite-sized treats are coated in smooth melted chocolate, creating a decadent outer layer that perfectly complements their soft, velvety interior. Their vibrant red color and elegant presentation make them a standout dessert for any occasion, from kids’ birthday parties to adult gatherings or holiday celebrations like Valentine’s Day or Christmas.
Their versatility ensures they appeal to fans of all ages, while their no-bake preparation makes them an accessible option for bakers of any skill level. For more dessert inspiration, explore our collection of festive recipes here.
3. Ingredients List (Exact Measurements)
To create these enchanting Red Velvet Cheesecake Balls, gather the following ingredients:
For the Cheesecake Balls:
- 1 box red velvet cake mix (or homemade equivalent)
- 1 (8 oz) package cream cheese (softened)
- 1 cup powdered sugar
- 1 teaspoon vanilla extract
For the Coating:
- 12 oz semi-sweet chocolate chips
- 1 tablespoon vegetable oil (for thinning the chocolate)
Optional Decorations:
- Sprinkles
- Crushed nuts
- Edible glitter
These simple yet high-quality ingredients ensure your cheesecake balls will be as delicious as they are visually stunning. For more ingredient ideas, browse our guide on dessert recipes here.
4. Step-by-Step Instructions
Preparing the Red Velvet Cake

Bake the red velvet cake according to the package instructions or your favorite recipe. Allow it to cool completely before crumbling it into fine crumbs using your hands or a food processor. The finer the crumbs, the better the texture of your cheesecake balls. If using store-bought cake, simply crumble it into small pieces. This step forms the base of your dessert, providing the signature red velvet flavor. For more baking tips, explore our guide on creative recipes here.
Making the Cheesecake Filling
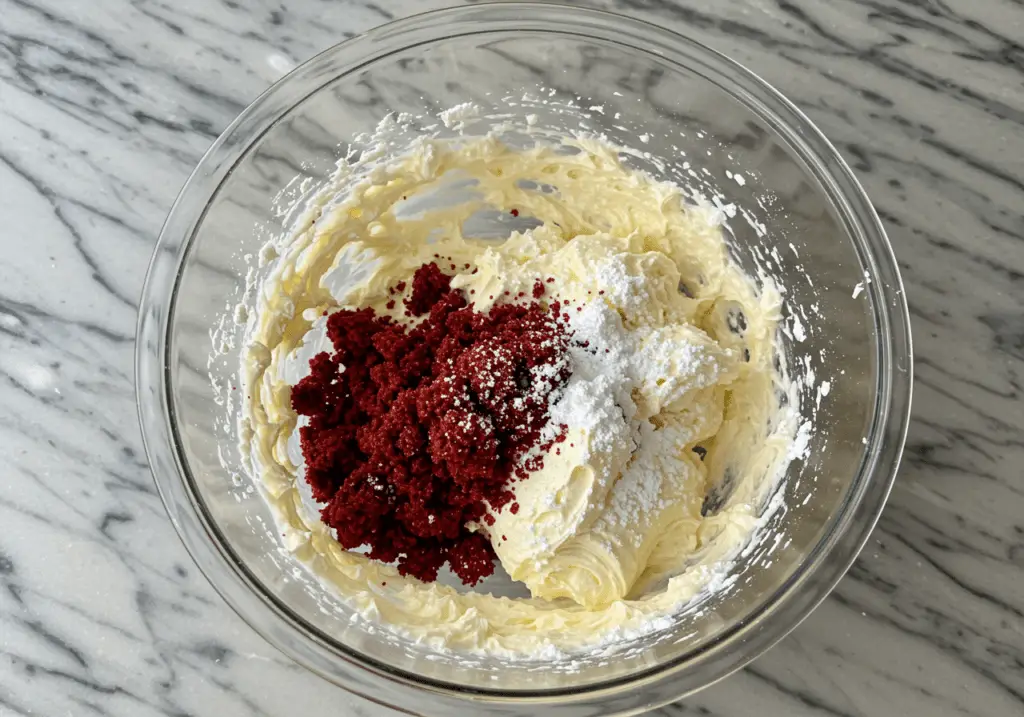
In a large mixing bowl, beat 1 (8 oz) package of softened cream cheese until smooth and creamy. Gradually add 1 cup of powdered sugar and 1 teaspoon of vanilla extract, mixing until fully combined. Fold in the red velvet cake crumbs, ensuring the mixture is evenly distributed. The final mixture should hold together when squeezed—adjust by adding more crumbs if needed. This step creates the rich, creamy filling that defines these cheesecake balls. For more cream cheese tips, visit our guide on dessert techniques here.
Shaping the Balls
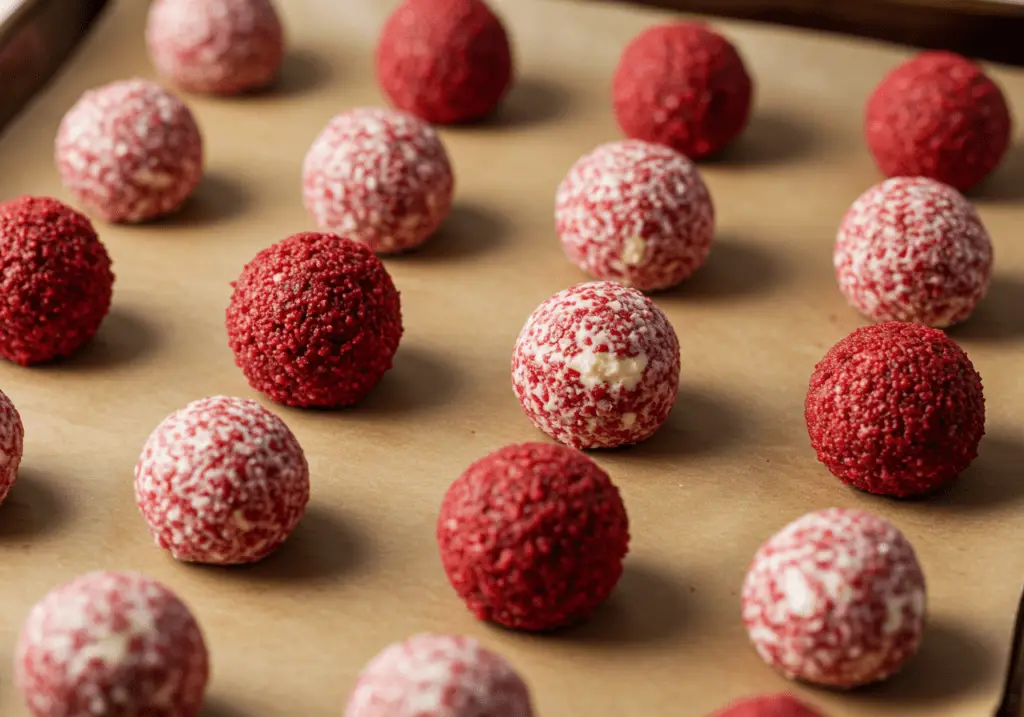
Using a cookie scoop or tablespoon, scoop out portions of the mixture and roll them into smooth, uniform balls. Place them on a baking sheet lined with parchment paper, ensuring they are spaced apart. Chill the shaped balls in the refrigerator for at least 30 minutes to firm up, which makes them easier to coat in chocolate later. For more shaping tips, explore our guide on bite-sized snacks here.
Coating the Balls
Melt 12 oz of semi-sweet chocolate chips with 1 tablespoon of vegetable oil in the microwave or over a double boiler, stirring until smooth. Dip each chilled ball into the melted chocolate, coating evenly, and place it back on the parchment paper. Immediately decorate with sprinkles, crushed nuts, or edible glitter before the chocolate sets. For best results, work quickly to ensure the toppings adhere smoothly. For more coating techniques, browse our collection of chocolate recipes here.
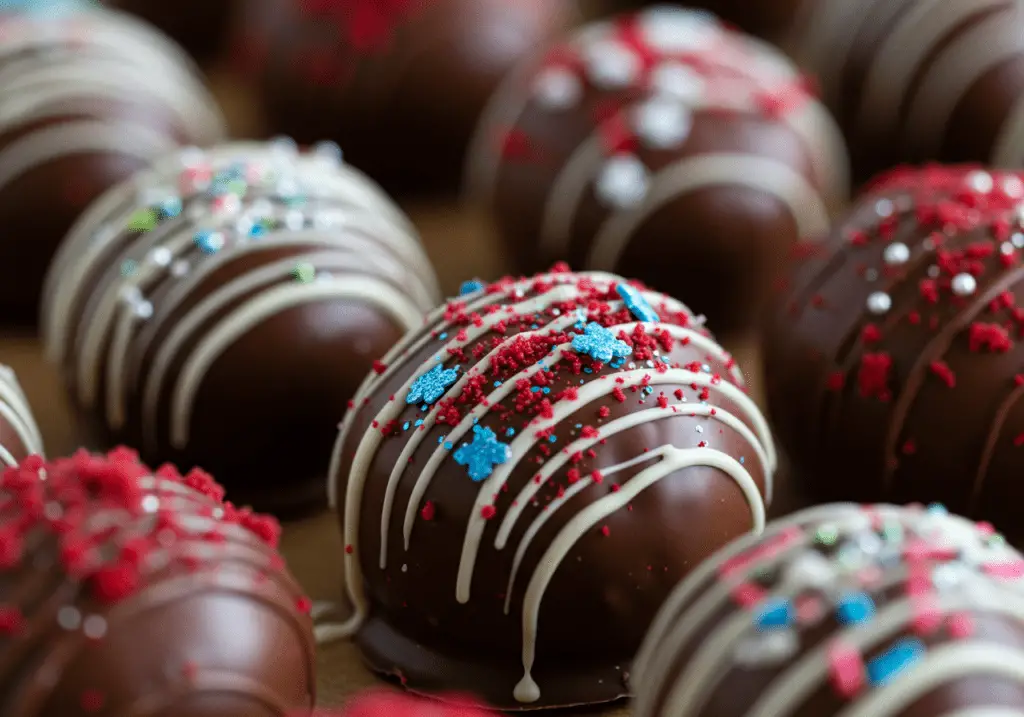
5. Decorating Your Cheesecake Balls
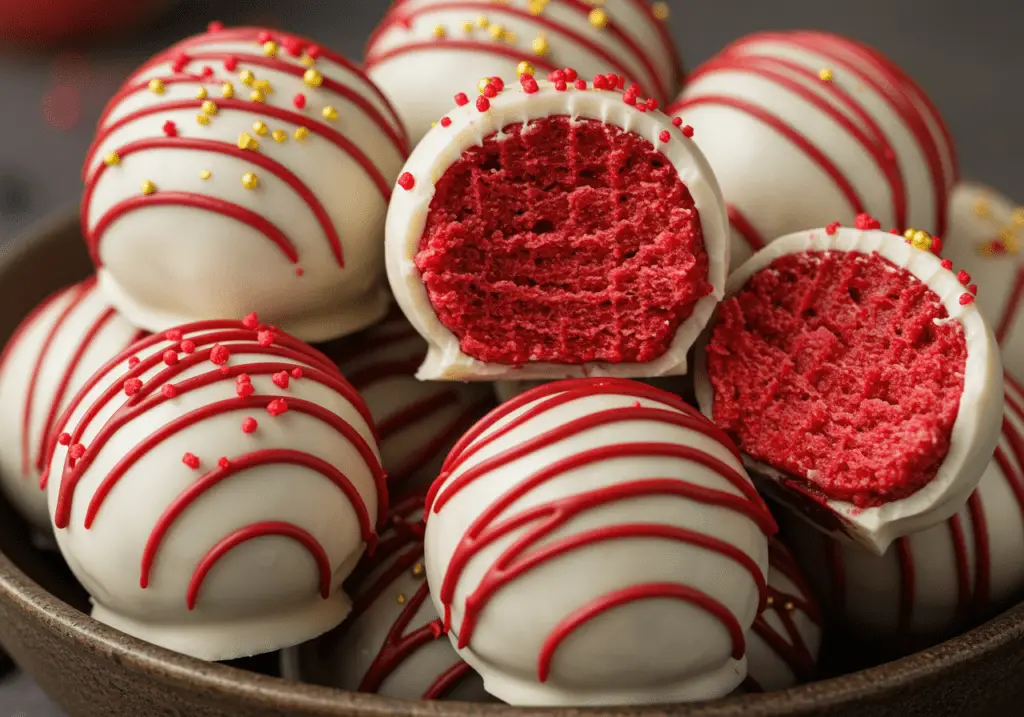
To elevate your Red Velvet Cheesecake Balls, focus on presentation. Use festive sprinkles, crushed nuts, or edible glitter to enhance their visual appeal. Experiment with white chocolate drizzles or colored candy melts for variety, creating patterns that suit the occasion—whether it’s hearts for Valentine’s Day or holly leaves for Christmas.
If gifting the balls, package them in clear bags tied with ribbon or place them in decorative boxes lined with parchment paper. Arrange them on a platter with thematic props like ribbons, flowers, or candles for added flair. These thoughtful details make your dessert even more memorable. For more decorating ideas, explore our guide on festive presentations here.
6. Serving Suggestions
These magical cheesecake balls pair beautifully with coffee, tea, or hot cocoa for a cozy dessert experience. They’re perfect for serving at parties, bake sales, or as gifts for friends and family. For a thoughtful presentation, wrap individual balls in parchment paper and tie them with ribbon for a personal touch.
To store leftovers, keep the cheesecake balls in an airtight container in the refrigerator for up to 5 days. For longer storage, freeze them in a single layer before coating in chocolate; thaw in the fridge before serving. For more serving ideas, browse our collection of dessert recipes here.
7. Variations and Substitutions
This recipe is adaptable to suit various preferences:
- Gluten-Free Option: Substitute regular red velvet cake mix with a gluten-free version or use a homemade gluten-free batter.
- Vegan Alternative: Use plant-based cream cheese and dairy-free chocolate for a vegan-friendly version.
- Flavor Substitution: Swap semi-sweet chocolate for dark chocolate or white chocolate for a different flavor profile.
These variations ensure everyone can enjoy the magic. For more customization ideas, check out our holiday desserts here.
8. Nutritional Information
Each Red Velvet Cheesecake Ball contains approximately 150 calories. Here’s the macronutrient breakdown per ball:
- Carbohydrates: 18g
- Fats: 9g
- Proteins: 2g
Please note these values may vary slightly based on substitutions or portion sizes. Enjoy responsibly!
9. FAQs Section
Here are answers to some common questions about this recipe:
Q: Can I use store-bought red velvet cake instead of baking one?
Absolutely! Store-bought cake works perfectly and saves time. Simply crumble it into fine pieces and proceed with the recipe.
Q: Why do my cheesecake balls fall apart?
Ensure the cake crumbs are finely crushed and the mixture is well-chilled before shaping. Adding too many crumbs can also dry out the mixture, so adjust accordingly.
Q: Can I freeze these cheesecake balls?
Yes, freeze them in a single layer before coating in chocolate. Thaw in the fridge before serving for best results.
Q: What can I use instead of cream cheese?
Mascarpone or a vegan cream cheese substitute works well as an alternative for a similar creamy texture.
10. Conclusion
Making Red Velvet Cheesecake Balls is a joyful way to celebrate creativity, flavor, and festivity in the kitchen. With their rich taste, elegant appearance, and ease of preparation, these bite-sized treats are sure to bring joy to any occasion. Whether you’re hosting a themed party, gifting to loved ones, or simply indulging in a sweet treat, this recipe promises to delight fans of all ages.
We’d love to see your creations! Share your photos on social media using the hashtag #RedVelvetCheesecakeMagic and tag us for a chance to be featured. Have feedback or questions? Leave a comment below—we’re here to help! For more dessert inspiration, explore our collection of easy recipes here. Cheers to bringing sweetness to life!
Red Velvet Cheesecake Balls
Treat yourself to these indulgent Red Velvet Cheesecake Balls, a perfect no-bake dessert that combines the classic red velvet cake with the creamy richness of cheesecake, all coated in smooth chocolate. These bite-sized delights are ideal for any celebration—whether for parties, holidays, or just to satisfy your sweet cravings.
- Total Time: 1 hour (includes chilling)
- Yield: 24 cheesecake balls 1x
Ingredients
For the Cheesecake Balls:
- 1 box red velvet cake mix (or homemade equivalent)
- 1 (8 oz) package cream cheese (softened)
- 1 cup powdered sugar
- 1 tsp vanilla extract
For the Coating:
- 12 oz semi-sweet chocolate chips
- 1 tbsp vegetable oil (for thinning the chocolate)
- Optional: Sprinkles, crushed nuts, or edible glitter for decoration
Instructions
Preparing the Red Velvet Cake
- Prepare the red velvet cake mix according to package instructions. Allow it to cool completely.
- Once cooled, crumble the cake into fine crumbs using your hands or a food processor.
Making the Cheesecake Filling
- In a large mixing bowl, beat the softened cream cheese until smooth.
- Gradually add the powdered sugar and vanilla extract, continuing to beat until fully combined.
- Fold in the red velvet cake crumbs until the mixture holds together when squeezed.
Shaping the Balls
- Use a cookie scoop or tablespoon to scoop out portions of the cheesecake mixture.
- Roll each portion into a smooth ball and place them on a parchment-lined baking sheet.
- Chill the balls in the refrigerator for at least 30 minutes to firm up.
Coating the Balls
- Melt the chocolate chips with the vegetable oil in the microwave or over a double boiler, stirring until smooth.
- Dip each chilled cheesecake ball into the melted chocolate, coating evenly.
- Return the balls to the parchment-lined baking sheet and decorate with sprinkles, crushed nuts, or edible glitter before the chocolate sets.
Notes
- Chilling the balls before coating ensures a sturdier texture and prevents the coating from slipping off.
- These cheesecake balls can be made in advance and stored in the refrigerator for up to a week or frozen for later use.
- Prep Time: 30 minutes
- Cook Time: 0 minutes (no-bake)
- Category: Dessert, No-Bake Treats, Holiday Desserts
- Method: No-Bake, Chilling
- Cuisine: American, Holiday Treats
- Diet: Vegetarian